Today we will finish the MoonShot application by working with container relative frame and ScrollView.
Showing Mission Details with ScrollView and containerRelativeFrame() #
When the user selects one of the Apollo missions from our master list, we want to show information about the mission: the mission badge, the mission description and all the astronauts on the crew with their roles. The first two of these are not too difficult, but the third one requires a bit more work because we need to match the crew IDs with the crew details in our two JSON files.
Let’s start simple; let’s create a new SwiftUI view called MissionView.swift. Initially this will only have a mission property so we can show the mission badge and description, but we will soon add more to it.
The Layout needs to have a resizable image for the mission badge and then a Scrolling VStack containing a text view. To set the width of the Mission View we will use containerRelativeFrame() and set a width between 50% and 70%.
Let’s add the following code to MissionView.swift;
struct MissionView: View {
    let mission: Mission

    var body: some View {
        ScrollView {
            VStack {
                Image(mission.image)
                    .resizable()
                    .scaledToFit()
                    .containerRelativeFrame(.horizontal) { width, axis in
                        width * 0.6
                    }
                    .padding(.top)

                VStack(alignment: .leading) {
                    Text("Mission Highlights")
                        .font(.title.bold())
                        .padding(.bottom, 5)

                    Text(mission.description)
                }
                .padding(.horizontal)
            }
            .padding(.bottom)
        }
        .navigationTitle(mission.displayName)
        .navigationBarTitleDisplayMode(.inline)
        .background(.darkBackground)
    }
}
Placing a VSTack inside another VSTack allows us to control the alignment for a specific part of the view. The mission image can be centered, while the mission details can be aligned to the front edge.
The MissionView we just created will not be rendered because of the preview. Since our Bundle extension works here too, we can easily solve this problem.
#Preview {
    let missions: [Mission] = Bundle.main.decode("missions.json")

    return MissionView(mission: missions[0])
        .preferredColorScheme(.dark)
}
**Since the NavigationStack in ContentView has the dark color scheme added to it, MissionView will have it too, but MissionView Preview doesn’t know about it, so we have to enable it manually.
If you look at the preview you will see that this is a good start, but the next part is more difficult: we want to show the list of astronauts participating in the mission below the description. Let’s tackle this now.
Combining Codable Structs #
Below the mission description we want to show pictures, names and roles of each crew member, which means matching data from two different JSON files.
If you remember, our JSON data was split into missions.json and astronauts.json files. This eliminates duplication in our data as some astronauts are involved in more than one mission, but it also means that we need to write some code to merge our data.
What we need to do is to have our MissionView, along with the astronaut dictionary, accept the mission touched on the previous screen and then find out which astronauts participated in the launch.
Let’s now add this nested struct inside MissionView.
struct CrewMember {
    let role: String
    let astronaut: Astronaut
}
We need to add a property to MissionView that stores an array of CrewMember objects.
let crew: [CrewMember]If we give this view the mission and all astronauts, we can loop over the mission crew, then for each crew member we can find the one with the matching id in the dictionary. When we find one we can convert it and its role into a CrewMember object, but if we don’t find one it means we somehow have a crew role with an invalid or unknown name.
This latter situation should never happen. If this happens due to incorrect JSON data, we should terminate the application with fatalError() and report it.
Let’s put all this in code using the custom Initializer for MissionView.
init(mission: Mission, astronauts: [String: Astronaut]) {
    self.mission = mission

    self.crew = mission.crew.map { member in
        if let astronaut = astronauts[member.name] {
            return CrewMember(role: member.role, astronaut: astronaut)
        } else {
            fatalError("Missing \(member.name)")
        }
    }
}
After writing this code, the preview code will stop working because it needs more information. So let’s add a second call to the decode() method.
#Preview {
    let missions: [Mission] = Bundle.main.decode("missions.json")
    let astronauts: [String: Astronaut] = Bundle.main.decode("astronauts.json")

    return MissionView(mission: missions[0], astronauts: astronauts)
        .preferredColorScheme(.dark)
}
Now that we have all our astronaut data, we can show it directly below the mission description using a horizontal scroll view. We will also add more styling to the astronaut images by using a capsule clip shape and overlay to make them look better.
Add this code right after VStack(alignment: .leading).
ScrollView(.horizontal, showsIndicators: false) {
    HStack {
        ForEach(crew, id: \.role) { crewMember in
            NavigationLink {
                Text("Astronaut details")
            } label: {
                HStack {
                    Image(crewMember.astronaut.id)
                        .resizable()
                        .frame(width: 104, height: 72)
                        .clipShape(.capsule)
                        .overlay(
                            Capsule()
                                .strokeBorder(.white, lineWidth: 1)
                        )

                    VStack(alignment: .leading) {
                        Text(crewMember.astronaut.name)
                            .foregroundStyle(.white)
                            .font(.headline)
                        Text(crewMember.role)
                            .foregroundStyle(.white.opacity(0.5))
                    }
                }
                .padding(.horizontal)
            }
        }
    }
}
Why is ScrollView after the VStack and not inside it? Because scroll views work best when they take full advantage of the available screen space, which means they need to be scrolled from edge to edge. If we put it inside our VStack, it would have the same padding as the rest of our text, which means it would scroll awkwardly.
Replace Text("Detail View") in the NavigationLink inside the ContentView with the following.
MissionView(mission: mission, astronauts: astronauts)When you run the application you will see that it starts to become useful.
SwiftUI provides a special Divider view to create a visual separation in the layout, but it is not customizable, it is always just a thin line. So, to get something a bit more useful, we will draw a custom Divider.
First, place it just before the text “Mission Highlights”;
Rectangle()
    .frame(height: 2)
    .foregroundStyle(.lightBackground)
    .padding(.vertical)
Place the same code directly after mission.description.
To complete this view I will add a header before our team, but this needs to be done carefully. As you can see, even though this is related to the scroll view, it needs to have the same padding as the rest of our text. So the best place for this is inside the VStack, right after the previous Rectangle();
Text("Crew")
    .font(.title.bold())
    .padding(.bottom, 5)
The Final Touch #
To finish this application, we will create a third and final view to display the astronaut details, and we will access the view by tapping one of the astronauts in the mission view.
Let’s start by creating a new SwiftUI view called AsronautView. This will have a single Astronaut property so it knows what to show, then we’ll organize it using a similar ScrollView / VStack combination as in MissionView.
struct AstronautView: View {
    let astronaut: Astronaut

    var body: some View {
        ScrollView {
            VStack {
                Image(astronaut.id)
                    .resizable()
                    .scaledToFit()

                Text(astronaut.description)
                    .padding()
            }
        }
        .background(.darkBackground)
        .navigationTitle(astronaut.name)
        .navigationBarTitleDisplayMode(.inline)
    }
}
Once again we need to update the preview so that it can render the view with the data.
#Preview {
    let astronauts: [String: Astronaut] = Bundle.main.decode("astronauts.json")

    return AstronautView(astronaut: astronauts["aldrin"]!)
        .preferredColorScheme(.dark)
}
Now we can present it from the NavigationLink inside the MissionView. This currently points to Text("Astronaut details"), but we can update it to point to our new AstronautView instead.
AstronautView(astronaut: crewMember.astronaut)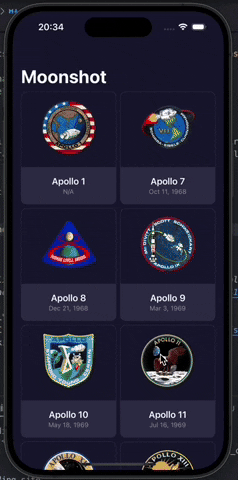
You can also read this article in Turkish.
Bu yazıyı Türkçe olarak da okuyabilirsiniz.