In today’s article, we will look at Codable in more detail. We will also look at Generics, which allow us to create highly reusable code.
Loading a Certain Type of Codable Data #
In this application we will load two different types of JSON into Swift structs. One for astronauts and one for missions. Realizing this in a way that is easy to maintain and doesn’t complicate our code requires some thought, but we’ll go step by step.
First, drag the astronauts.json and missions.json files from here into the project navigator. Also drag the images from the Images folder in the same link to the asset folder of your Xcode project.
If you look at the astronauts.json file, you will see that each astronaut is identified by three fields: id, name and description
Now let’s convert this astronaut data into a Swift struct. To create a new file, press Cmd+N, select Swift files and name it Astronaut.swift. Add it to the file you just created;
Translated with DeepL.com (free version)
struct Astronaut: Codable, Identifiable {
    let id: String
    let name: String
    let description: String
}
As you can see, we have made this struct Codable so that we can create instances of this struct directly from JSON, but also Identifiable so that we can use astronaut arrays for ForEach and more.
Next we want to convert astronauts.json into a dictionary of Astronaut instances. This means we need to use Bundle to find the path to the file, load it into a Data instance and pass it through a JSONDecoder. Earlier we put this in a method on ContentView, but here I want to show you a better way: we will write an extension on Bundle to do it all in one central place.
Create another new Swift file, this time called Bundle-Decodable.swift. This will mostly use the code you saw before, but there is a small difference: before we used String(contentOf:) to load into a string, but since Codable uses Data we will use Data(contentsOf:) instead. It works the same way as String(contentsOf:): give it a file URL to load and it either returns its contents or throws an error.
Translated with DeepL.com (free version)
extension Bundle {
    func decode(_ file: String) -> [String: Astronaut] {
        guard let url = self.url(forResource: file, withExtension: nil) else {
            fatalError("Failed to locate \(file) in bundle.")
        }

        guard let data = try? Data(contentsOf: url) else {
            fatalError("Failed to load \(file) from bundle.")
        }

        let decoder = JSONDecoder()

        guard let loaded = try? decoder.decode([String: Astronaut].self, from: data) else {
            fatalError("Failed to decode \(file) from bundle.")
        }

        return loaded
    }
}
We’ll come back to this in a moment, but as you can see we use the fatalError() method a lot: the application will crash if the file cannot be found, loaded or decoded.
Let’s add this property to the ContentView struct;
let astronauts = Bundle.main.decode("astronauts.json")Yes, that’s all there is to it. Of course, all we did was move the code out of ContentView and into an extension, so our views stay small and focused.
If you want to double check that our JSON is loaded correctly, change the default body property like this;
Text(String(astronauts.count))You should see 32 on the screen.
Before we finish, I want to go back to the extension and take a closer look at it. The code we have is fine for this application, but let’s add some extra code to help us diagnose problems if we want to use it in the future;
let decoder = JSONDecoder()

do {
    return try decoder.decode([String: Astronaut].self, from: data)
} catch DecodingError.keyNotFound(let key, let context) {
    fatalError("Failed to decode \(file) from bundle due to missing key '\(key.stringValue)' – \(context.debugDescription)")
} catch DecodingError.typeMismatch(_, let context) {
    fatalError("Failed to decode \(file) from bundle due to type mismatch – \(context.debugDescription)")
} catch DecodingError.valueNotFound(let type, let context) {
    fatalError("Failed to decode \(file) from bundle due to missing \(type) value – \(context.debugDescription)")
} catch DecodingError.dataCorrupted(_) {
    fatalError("Failed to decode \(file) from bundle because it appears to be invalid JSON.")
} catch {
    fatalError("Failed to decode \(file) from bundle: \(error.localizedDescription)")
}
This is not a big change, but it means that the method will now tell you what went wrong with the decode.
Using Generics for All Types of Codable Data #
We added a Bundle extension to load a specific JSON data type from the Application Bundle, but now we have a second type: missions.json This contains slightly more complex JSON:
- Each task has an ID number, which means we can easily use
Identifiable. - Each mission has a string plain text description from Wikipedia.
- Each mission has an array with the name and role of the crew members.
- All but one of the missions has a launch date. Unfortunately, Apollo 1 was never launched because there was a fire in the cabin during the launch rehearsal and the entire crew died.
Let’s start translating this into code. Crew roles need to be represented as their own struct that stores a name array and a role array. So, create a new Swift file called Mission.swift and write this code.
struct CrewRole: Codable {
    let name: String
    let role: String
}
missions, an Int ID, a CrewRole array and a description array. What about the launch date, which may or may not be a value?
Well, think about it: How does Swift represent this “maybe, maybe not” elsewhere? How do we store the expression “could be a string, could be nothing”? The answer is obvious: we use optional. In fact, if we mark a property as optional, Codable will automatically skip over it if the value is missing in our JSON input.
Now let’s add this second struct to Mission.swift;
struct Mission: Codable, Identifiable {
    let id: Int
    let launchDate: String?
    let crew: [CrewRole]
    let description: String
}
Before we look at how to load JSON into it, I want to show one more thing: the CrewRole struct is specifically made to hold mission related data, and as a result we can nest the CrewRole struct into the Mission struct like this;
struct Mission: Codable, Identifiable {
    struct CrewRole: Codable {
        let name: String
        let role: String
    }

    let id: Int
    let launchDate: String?
    let crew: [CrewRole]
    let description: String
}
This is called a nested struct and is simply one struct nested inside another. This will not affect the code in the project, but it is useful elsewhere to help us keep our code organized. Instead of saying CrewRole we can write Mission.CrewRole.
Now let’s consider how we can load missions.json into a Mission struct array. We have already written a Bundle extension that loads a JSON file into an Astronaut struct dictionary, so we can easily copy and paste it, then modify it to load missions instead of astronauts. But there is a better solution: We can use Swift’s Generics system.
Generics allows us to write code that can work with different types. In this project, we wrote the Bundle extension to work with Astronaut dictionaries, but we actually want to be able to handle Astronaut dictionaries, Mission arrays or potentially many other things.
To make a method generic, we give it a placeholder for certain types. The placeholder is written between angle brackets ( < and > ) after the method name, before the parameters.
func decode<T>(_ file: String) -> [String: Astronaut] {We can use anything for this placeholder. We could write “Type,” “TypeOfAnything” or “Fish”, it doesn’t matter. “T” has a traditional use to symbolize “Type”.
Inside the method we can now use “T” wherever we would use [String: Astronaut]. This is literally a placeholder for the type we want to work with. So instead of returning [String: Astronaout] we will use this;
func decode<T>(_ file: String) -> T {Be Careful: There is a big difference between T and [T]. Remember, T is a placeholder for the type we want, so if we say “Decode Astronaut dictionary”, T becomes [String: Astronaut]. If we try to return [T] from the decode() method, we will actually return [[String: Astronaut]], which is wrong.
There is another place where [String: Astronaut] is used towards the middle of the decode() method;
return try decoder.decode([String: Astronaut].self, from: data)Change it to T, like this;
return try decoder.decode(T.self, from: data)That is, we said that the decode() method would be used with a type like [String: Astronaut] and that it should try to decode the file it loads as being of that type.
If you try to compile this code, you will see an error in Xcode: “Instance method ‘decode(_:from:)’ requires that ‘T’ conform to ‘Decodable’” This means that T can be anything: Astronaut dictionary or a dictionary of something else entirely. The problem is that Swift can’t be sure that the type we’re working on conforms to the Codable protocol, so it refuses to generate our code instead of taking the risk.
Fortunately we can solve this; we can tell Swift that T can be anything we want as long as it conforms to Codable. This way Swift knows it’s safe to use and makes sure we don’t try to use the method with a type that doesn’t conform to Codable.
Let’s change the signature of the method like this;
func decode<T: Codable>(_ file: String) -> T {If you try to compile again, you will see that things still don’t work, but now for a different reason. In the astronauts property of ContentView you will see the error “Generic parameter ‘T’ could not be inferred “. This line was working fine before, but now there has been a significant change: decode() used to always return an astronaut dictionary, but now it returns anything we want as long as it conforms to Codable.
We know it will still return astronaut dictionary because the underlying data hasn’t changed, but Swift doesn’t know that. Our problem is that the decode() method can return any type that conforms to Codable, but Swift needs more information - it wants to know exactly what type.
Therefore, we need to use type annotation to fix this, so Swift knows exactly what astronauts are.
let astronauts: [String: Astronaut] = Bundle.main.decode("astronauts.json")Finally we can now load mission.json into another property in ContentView. Add the following code under astronauts;
let missions: [Mission] = Bundle.main.decode("missions.json")This is the power of Generics. We can use the same decode() method to load any JSON in our Bundle into any Swift type that fits Codable. So we don’t need half a dozen variants of the same method.
You may have seen the message “Instance method ‘decode(_:from:)’ requires that ‘T’ conform to ‘Decodable’” before and wondered what Decodable is, after all we use Codable everywhere. Behind the scenes, Codable is just an alias for two separate protocols: Encodable and Decodable. You can use Codable if you like, or you can use Encodable and Decodable if you prefer to be specific, it’s up to you.
Formatting Mission View #
Now that we have all our data ready, we can look at the design of our first screen; a grid of all missions next to the mission badges
The assets we added earlier contain images with names like “[email protected] “ and so on, which means they are accessible in the asset catalog with names like “apollo1”, “apollo12” and so on. The Mission struct has an id integer to provide the number part, so we can use string interpolation like "apollo\(mission.id)" to get our image name and "Apollo \(mission.id)" to get the formatted, display name of the mission.
But here we will take a different approach: We will add some computed properties to the Mission struct to send back the same data. The result will be the same; “apollo1” and “Apollo 1”
Please add these two properties to the Mission struct;
var displayName: String {
    "Apollo \(id)"
}

var image: String {
    "apollo\(id)"
}
Now we can take the first step to write the ContentView: NavigationStack with the title NavigationStack, a LazyVGrid using the missions array as input, and a NavigationLink with the mission’s image, name and launch date on each line inside. The only minor complication here is that our launch date is an optional string, so we need to use nil coalescing to make sure it is a value that the text view will display.
First, let’s add this property to ContentView to define an adaptive column layout;
let columns = [
    GridItem(.adaptive(minimum: 150))
]
Mevcut body property’sini bununla değiştirin;
NavigationStack {
    ScrollView {
        LazyVGrid(columns: columns) {
            ForEach(missions) { mission in
                NavigationLink {
                    Text("Detail view")
                } label: {
                    VStack {
                        Image(mission.image)
                            .resizable()
                            .scaledToFit()
                            .frame(width: 100, height: 100)

                        VStack {
                            Text(mission.displayName)
                                .font(.headline)
                            Text(mission.launchDate ?? "N/A")
                                .font(.caption)
                        }
                        .frame(maxWidth: .infinity)
                    }
                }
            }
        }
    }
    .navigationTitle("Moonshot")
}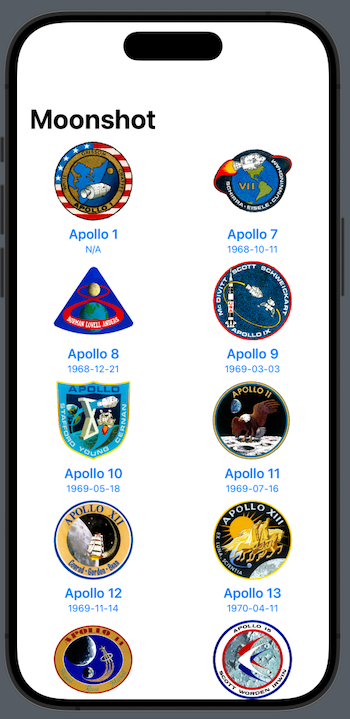
It looks pretty ugly, but we’ll fix it in a moment. First, let’s focus on what we have so far: a scrollable vertical grid that uses resizable(), scaledToFit() and frame() to allow the image to cover an area of 100x100 while maintaining the original aspect ratio.
When you run the application you may notice that the dates are not formatted very well. We can do better than that.
Swift’s JSONDecoder type has a property called dateDecodingStrategy that determines how it decodes dates. We can provide this with a DateFormatter instance that describes how to format our dates. In this example our dates are written as year-month-day and according to the DateFormat they are written as “y-MM-dd”.
Warning : Date formats are case sensitive;
mmzero-padded minutesMMstands for zero-filled month.
Open Bundle-Decodable.swift and add this code right after let decoder = JSONDecoder():
let formatter = DateFormatter()
formatter.dateFormat = "y-MM-dd"
decoder.dateDecodingStrategy = .formatted(formatter)
Tip: When working with dates it is usually a good idea to be specific about your time zone, otherwise the user’s own time zone will be used when parsing the date and time. However, we will also display the date in the user’s timezone, so there is no problem here.
If you run the code now, everything will look exactly the same. Yes, nothing has changed, but that’s okay. Nothing has changed because Swift didn’t realize that launchDate is a date. That’s how we declared it after all;
let launchDate: String?Now that our decode code understands how our dates are formatted, we can change this property to an optional Date.
let launchDate: Date?Our code is not compiling because the problem is this line of code in ContentView.swift;
Text(mission.launchDate ?? "N/A")This tries to use an optional Date in a text view or replace it with “N/A” if the date is empty. We can use computed property here. We can ask Mission itself to provide a formatted date that converts an optional date into a properly formatted string or returns “N/A” for missing dates.
This uses the formatted() method we used earlier, so this should be somewhat familiar to you. Add this computed property to Mission;
var formattedLaunchDate: String {
    launchDate?.formatted(date: .abbreviated, time: .omitted) ?? "N/A"
}
And now replace the broken text view in ContentView with this one;
Text(mission.formattedLaunchDate)With this change, our dates will be rendered in a much more natural way and, even better, in a way that suits the user’s region.
Now let’s focus on a bigger problem: the layout is quite boring.
Let’s introduce two useful features: custom app colors and forcing the app into a dark mode theme.
First, the colors. There are two ways to do this and both are useful. We can add colors to the asset catalog with specific names or we can add them as a Swift extension. Both have their advantages. Using the asset catalog allows us to work visually, but using it as code makes it easier to track changes using something like Github.
I prefer the code approach because it makes it easier to track changes when working in teams, so we will add our color names as extensions to Swift.
If we make these extensions on Color we can use them in several places in SwiftUI, but Swift gives us a good option with just a little more code. Color fits into a larger protocol called ShapeStyle which allows us to use colors, gradinet, material and more as if they were the same thing.
The ShapeStyle protocol is what the background() modifier uses, so what we really want to do is extend Color but do it in such a way that all SwiftUI modifiers that use ShapeStyle also work.
To try this, create a new Swift file called Color-Theme.swift and write this code;
import SwiftUI

extension ShapeStyle where Self == Color {
    static var darkBackground: Color {
        Color(red: 0.1, green: 0.1, blue: 0.2)
    }

    static var lightBackground: Color {
        Color(red: 0.2, green: 0.2, blue: 0.3)
    }
}
This adds two new colors, darkBackground and lightBackground. But more importantly, we place them inside a very special extension that allows us to use these colors wherever SwiftUI expects a ShapeStyle.
Let’s use these new colors in the app. First, find the VStack containing the mission name and launch date and change the modifier order to
.padding(.vertical)
.frame(maxWidth: .infinity)
.background(.lightBackground)
Next, we want the VStack in NavigationLink to look more like a box in the grid, this means drawing a line around it and cropping the shape a bit. To do this, let’s add these modifiers at the end;
.clipShape(.rect(cornerRadius: 10))
.overlay(
    RoundedRectangle(cornerRadius: 10)
        .stroke(.lightBackground)
)
Thirdly, we need to add padding to move the images a bit away from the edges. We can do this by adding padding right after the 100x100 frames of the Mission images.
.padding()Then add some horizontal and bottom padding to the grid;
.padding([.horizontal, .bottom])Important : This should be added to LazyVGrid, not to ScrollView. If we add padding to the ScrollView, we also add it to the scrollbars and that looks weird.
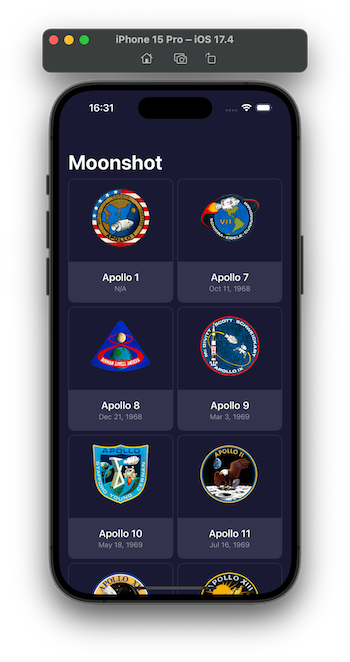
Now we can replace the white background with the custom background color we created earlier, let’s add this modifier to the ScrollView after the navigationTitle() modifier;
.background(.darkBackground)At this point the custom layout is almost complete. But we still need to change some colors. For example, the mission names are blue and the “Moonshot” title is black, which looks quite incompatible.
We can solve the problem with mission names and dates as follows;
VStack {
    Text(mission.displayName)
        .font(.headline)
        .foregroundStyle(.white)
    Text(mission.formattedLaunchDate)
        .font(.caption)
        .foregroundStyle(.white.opacity(0.5))
}
As for the “Moonshot” title, this belongs to the NavigationStack and will appear black or white depending on whether the user is in light mode or dark mode. To fix this, we can tell SwiftUI that the view always prefers to be in dark mode.
To complete the design of this view, let’s add the last modifier to ScrollView after background();
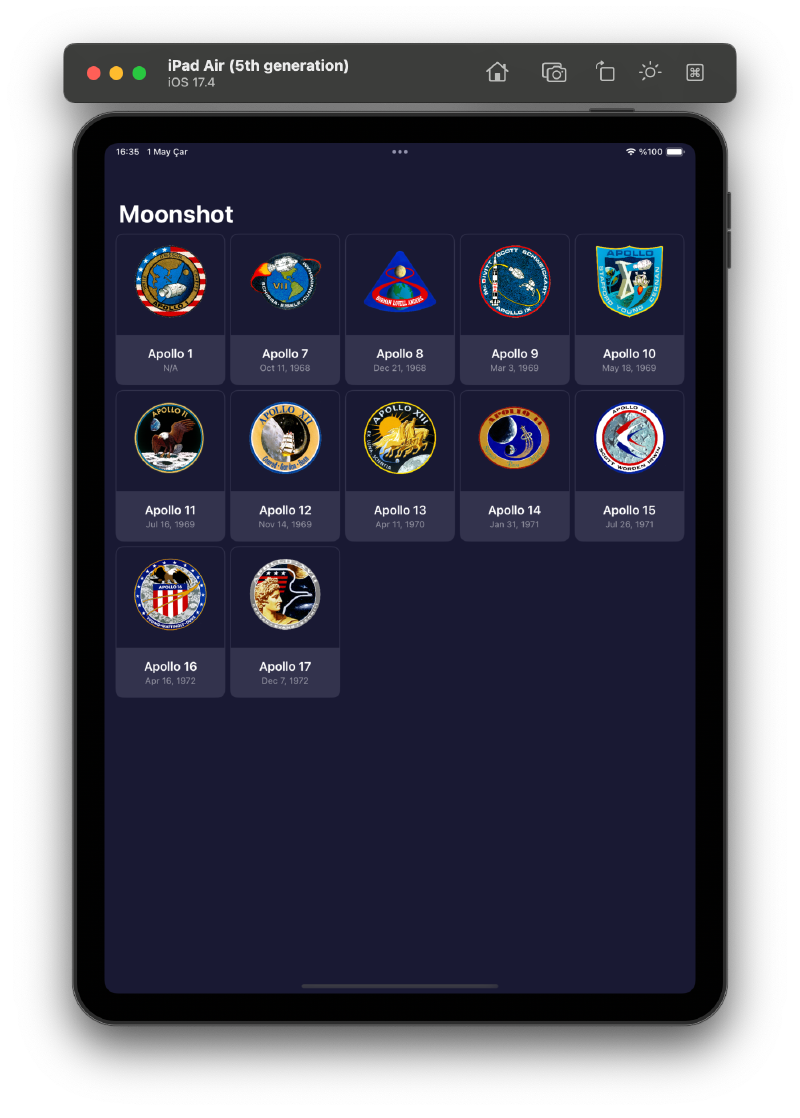
.preferredColorScheme(.dark)When you run the app, we’ll have a beautifully scrolling grid that will adapt seamlessly across a wide range of device sizes.
You can also read this article in Turkish.
Bu yazıyı Türkçe olarak da okuyabilirsiniz.