
In this section we will start a new project and with this project we will examine animations in SwiftUI. Thanks to animations, we will make the user interface look better and get a better user experience.
SwiftUI Implict Animation #
The simplest type of animation in SwiftUI is implict animation. We tell views in advance “if someone wants to animate you, here’s how you should respond”. SwiftUI will then ensure that all changes that occur will follow the animation we requested.
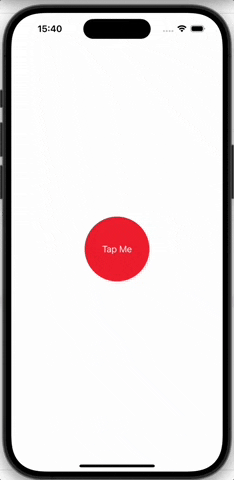
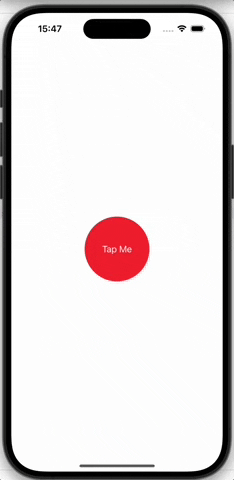
Let’s start with an example. The code below shows a circular, simple button with no action.
Button("Tap Me") {
    // do nothing
}
.padding(50)
.background(.red)
.foregroundStyle(.white)
.clipShape(.circle)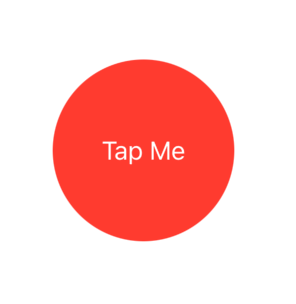
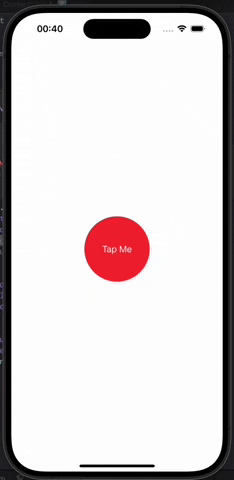
What we want is for this button to grow every time it is touched, and we can do this with a new modifier called scaleEffect(). Give it a value greater than 0 and the button will be drawn at that size. A value of 1.0 is equivalent to 100%, the normal size of the button.
Since we want to change the scaleEffect value every time the button is touched, we need to use an @State property to store a Double. Let’s add the following property;
@State private var animationAmount = 1.0Now we can make the button use the effect by adding this modifier.
.scaleEffect(animationAmount)Finally, we want to increase the amount of animation by 1 when the button is touched, so let’s use this for the button’s action;
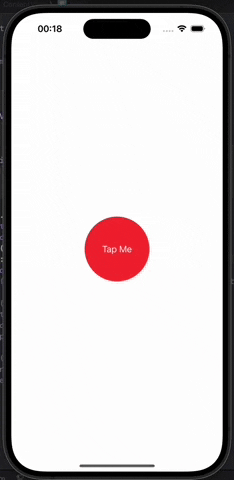
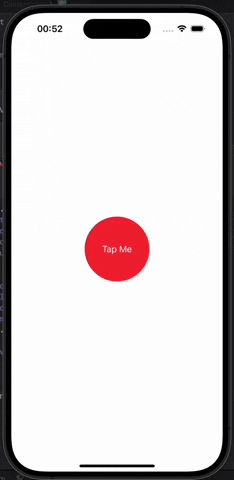
animationAmount += 1If you run this code, you will see that you can enlarge the button by tapping it repeatedly. It won’t redraw at increasingly higher resolutions, so you’ll see that the button gets a bit blurry as it gets bigger.
The human eye is extremely sensitive to motion. We are extremely good at detecting when objects move or change their appearance, which makes animation both very important and very pleasant. Therefore, we can ask SwiftUI to create implict animation for our changes, so we can add an animation() modifier to the button so that all scaling happens seamlessly;
.animation(.default, value: animationAmount)Whenever the animationAmount value changes, SwiftUI will ask SwiftUI to apply a default animation so that you will see the animation every time you tap the button.

This implict has an effect on all the properties of the animation view changing, so if we add more animation modifiers to the view, they will all change together. For example, we can add a second modifier to the button, blur() which allows us to add a Gaussian blur with a custom radius. Add the following before the animation() modifier.
.blur(radius: (animationAmount - 1) * 3)(animationAmount - 1) * 3 means that the blur radius will start at 0 (no blur), but when we tap the button it will move to 3 points, 6 points, 9 points and beyond.
If you run the app again, you will see that it now scales and blurs smoothly.
The thing is, we didn’t say anywhere what each frame of the animation should look like, and we didn’t even say when SwiftUI should start and end the animation. This is like views in SwiftUI being a function of their state.
Customizing Animations in SwiftUI #
When we add the animation() modifier to a view, SwiftUI will automatically animate any changes that occur in that view using whatever the default system animation is when the value we are watching changes. In practice, this is a very smooth spring animation, meaning that iOS will start the animation slowly, then speed it up until it slightly exceeds the target value, then backtrack until it reaches its final state, and so on.
We can control the type of animation used by entering different values for the modifier. For example, we can use .linear to make the animation move at a constant speed from start to finish.
.animation(.linear, value: animationAmount)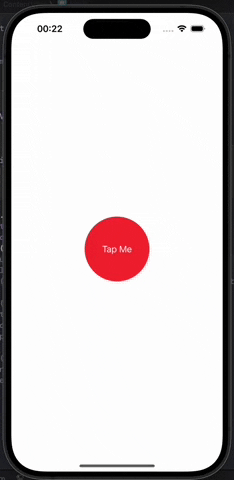
***Hint : Implict animations must always follow a specific value, otherwise animations are triggered for every small change. For example, even rotating the device from portrait to landscape would trigger the animation, which would look weird.
By default, iOS selects spring animations because they mimic what we are used to in the real world. These are highly customizable. With spring we can control roughly how long it should take to complete and also how much the spring should bounce.
For example, this allows the button to scale quickly and then jump a lot;
.animation(.spring(duration: 1, bounce: 0.9), value: animationAmount)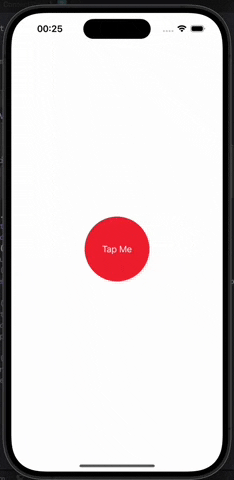
For more precise control, we can customize the animation with a duration specified in number of seconds. Thus, we can get an easy input-output animation lasting two seconds, like the one below;
struct ContentView: View {
    @State private var animationAmount = 1.0

    var body: some View {
        Button("Tap Me") {
            animationAmount += 1
        }
        .padding(50)
        .background(.red)
        .foregroundStyle(.white)
        .clipShape(.circle)
        .scaleEffect(animationAmount)
        .animation(.easeInOut(duration: 2), value: animationAmount)
    }
}
When we say .easeInOut(duration: 2), we are actually creating an instance of an animation structure with its own modifiers. So we can add modifiers directly to the animation to add a delay like this.
.animation(
    .easeInOut(duration: 2)
        .delay(1),
    value: animationAmount
)
Once you have done this, you will wait for one second before performing a two-second animation when you tap the button.
We can also ask the animation to repeat a certain number of times and even make it jump back and forth by setting autoreverses to true. This creates a one-second animation that will jump up and down before reaching its final size;
.animation(
    .easeInOut(duration: 1)
        .repeatCount(3, autoreverses: true),
    value: animationAmount
)
If we had set the number of repetitions to 2, the button would scale up, then down, then immediately jump back to the larger scale. This is because no matter what animations we apply, in the end the button should match the state of our program, so when the animation is finished the button should have the value set in animationAmount.

For continuous animations there is a repeatForever() modifier that can be used like this;
.animation(
    .easeInOut(duration: 1)
        .repeatForever(autoreverses: true),
    value: animationAmount
)
We can use these repeatForever() animations with onAppear() to create animations that start immediately and continue for the lifetime of the view.
To demonstrate this, we will remove the animation (.scaleEffect(animationAmount)) from the button itself and instead use an overlay to create a kind of vibrating circle around the button. The overlay is created using the overlay() modifier, which allows us to create new views with the same size and position as the view we are overlaying.
So, let’s first add this overlay() modifier to the button before the animation() modifier.
.overlay(
    Circle()
        .stroke(.red)
        .scaleEffect(animationAmount)
        .opacity(2 - animationAmount)
)
This creates a contoured red circle on our button using an opacity value of 2 - animationAmount, so that when animationAmount is 1 the opacity is 1 (opaque) and when animationAmount is 2 the opacity is 0 (transparent).
Next, we removed scaleEffect() from the button in the previous step, remove animationAmount += 1 in the button closure. Also move the animation modifier into overlay;
.overlay(
    Circle()
        .stroke(.red)
        .scaleEffect(animationAmount)
        .opacity(2 - animationAmount)
        .animation(
            .easeOut(duration: 1)
                .repeatForever(autoreverses: false),
            value: animationAmount
        )
)
Notice that we changed autoreverses to false in the code above.
Finally, add an onAppear() modifier to the button that will set the animationAmount value to 2.
.onAppear {
    animationAmount = 2
}
Since the overlay circle uses the reperat forever animation without autoreversing, you will see the overlay circle continuously growing and fading.
Your finished code should look like the one below.
Button("Tap Me") {
    // animationAmount += 1
}
.padding(50)
.background(.red)
.foregroundStyle(.white)
.clipShape(.circle)
.overlay(
    Circle()
        .stroke(.red)
        .scaleEffect(animationAmount)
        .opacity(2 - animationAmount)
        .animation(
            .easeInOut(duration: 1)
                .repeatForever(autoreverses: false),
            value: animationAmount
        )
)
.onAppear {
    animationAmount = 2
}
Animating Bindings #
The animation() modifier can be applied to any SwiftUI binding, which allows us to have animations triggered by data updates.
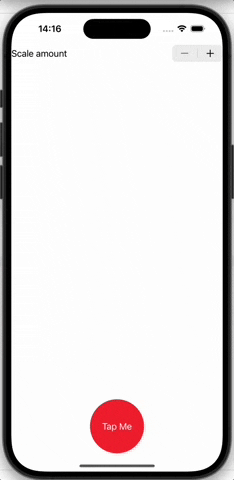
We can best understand this with code. A view containing a VStack, a Stepper and a Button is created with the following code.
struct ContentView: View {
    @State private var animationAmount = 1.0

    var body: some View {
        VStack {
            Stepper("Scale amount", value: $animationAmount.animation(), in: 1...10)

            Spacer()

            Button("Tap Me") {
                animationAmount += 1
            }
            .padding(40)
            .background(.red)
            .foregroundStyle(.white)
            .clipShape(.circle)
            .scaleEffect(animationAmount)
        }
    }
}
As you can see, the stepper can move animationAmount up and down and by touching the button it adds 1 to it. Both are tied to the same data and this causes the size of the button to change. However, tapping the button changes animationCount immediately, so the button jumps to the larger size. In contrast, the stepper depends on $animationAmount.animation(), which means that SwiftUI will automatically animate its changes.
Now as an experiment, let’s modify the beginning of body as follows;
var body: some View {
    print(animationAmount)

    return VStack {
Since we have some out of view code here, we need to add return before VStack so that Swift understands which part is the view being sent back. But adding print(animationAmount) is important and to see why, let’s run the program again and change the value of the stepper.
What you should see is that it prints 2.0, 3.0 4.0 etc. At the same time, the button scales up and down seamlessly, not jumping directly to 2,3,4, but animating the process. What actually happens is that SwiftUI examines the view’s state before the binding changes, examines the view’s target state after the binding changes, and then applies an animation to get from point A to point B.
This is why we can animate a Boolean change. Swift somehow doesn’t invent new values between false and true, it just animate the view changes that occur as a result of the change.
These binding animations use a similar animation() modifier that we use in views. Therefore we can use the same animation modifiers.
Stepper("Scale amount", value: $animationAmount.animation(
    .easeInOut(duration: 1)
        .repeatCount(3, autoreverses: true)
), in: 1...10)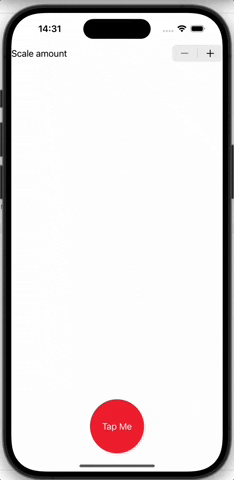
Tip : With this variant of the animation() modifier, we don’t need to specify which value we are tracking to track the changes. It is added to exactly the value it should track.
With these binding animations, instead of setting the animation on a view and animate it implicitly with a state change, we set nothing on the view and animate it with a state change.
SwiftUI Explict Animations #
In SwiftUI, we have seen how to create implict animation by adding the animation() modifier to a view and how to create binding animation by adding the animation() modifier to a binding. But there is a third way we can create animations: We can ask SwiftUI to animate changes that occur as a result of a state change.
This still doesn’t mean that we create every frame of the animation manually. This is still SwiftUI’s job and it finds the animation by looking at the view’s state before and after the state change is applied.
But now we specify that we want an animation to happen when a state change occurs. This is not dependent on a binding, we just want a certain animation to happen because of a state change.
To demonstrate this, let’s go back to a simple button example.
struct ContentView: View {
    var body: some View {
        Button("Tap Me") {
            // do nothing
        }
        .padding(50)
        .background(.red)
        .foregroundStyle(.white)
        .clipShape(.circle)
    }
}
When this button is touched, we will make it rotate around with a 3D effect. This requires another modifier, rotation3DEffect(). This modifier can be given a rotation amount in degrees and an axis that determines how the view will rotate. Think of this axis as a skewer going through the view;
- If we pass the skewer View along the X-axis (horizontally), it will be able to rotate forward and backward.
- If we pass the skewer View along the Y axis (vertically), it will be able to rotate left and right.
- If we pass the skewer View along the Z axis (depth), it will be able to rotate left and right on its axis.
To do this animation we need a state that we can change and the degrees of rotation are specified as Double. So let’s add this property;
@State private var animationAmount = 0.0Next, we will ask the button to rotate animationAmount degrees along the Y axis, i.e. it will rotate left and right. Let’s add this modifier to the button;
.rotation3DEffect(.degrees(animationAmount), axis: (x: 0, y: 1, z: 0))Now for the important part: we are going to add some code to the button’s action so that every time it is touched it will add 360 to the animationAmount value.
If we just write animationAmount += 360, the change will happen immediately because there is no animation modifier attached to the button. This is where explict animations come in. If we use the withAnimation() function, SwiftUI will automatically animate all changes resulting from the new state.
Let’s write the following codes to the button action;
withAnimation {
    animationAmount += 360
}
Every time we touched the button it rotated in 3D space and it was very easy to type. You can also try this for different axes.
The withAnimation() function can be given an animation parameter and all the animations we can use elsewhere in SwiftUI can be used. For example, we can make our rotation effect use a spring animation using a withAnimation() call like the one below.
withAnimation(.spring(duration: 1, bounce: 0.5)) {
    animationAmount += 360
}
You can also read this article in Turkish.
Bu yazıyı Türkçe olarak da okuyabilirsiniz.


