
SwiftUI Stepper Usage #
SwiftUI has two ways to allow users to enter numbers;
Stepper: A simple - and + button that can be tapped to select a number.Slider: Allows us to select from a range of values.
We can use the stepper with any kind of number. So we can bind them to Int, Double and more, it will automatically adapt. For example we can create a property like below;
@State private var sleepAmount = 8.0
We can then connect it to a stepper so that we can display the current value like this.
Stepper("\(sleepAmount) hours", value: $sleepAmount)
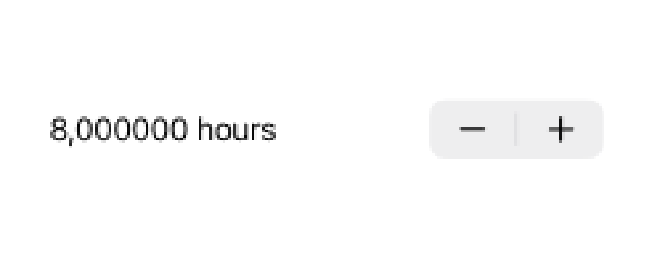
When this code runs, we see 8.000000 hours and by touching the - and + keys we can go down to 7,6,5 and negative numbers or up to 9, 10, 11.
By default steppers are limited only by the range of their storage. In this example we use a Double, which means that the maximum value of the stepper will be very large.
Stepper allows us to limit the values we want to accept by providing a range like the one below.
Stepper("\(sleepAmount) hours", value: $sleepAmount, in: 4...12)
With the code above, the stepper will start at 8, then allow the user to move between 4 and 12 but not beyond.
There is a fourth useful parameter for the stepper, which is a step value. Thanks to this step value we can determine how much to move each time - or + is touched. This can be any number, but it must match the type we are creating the stepper for. So if we bind the stepper to an integer, we cannot use Double as the step value.
In this example, we can say that users can choose any value between 4 and 12 in 0.25 steps.
Stepper("\(sleepAmount) hours", value: $sleepAmount, in: 4...12, step: 0.25)
Before we continue, let’s fix the 8,000000 a bit and get rid of the extra zeros. To fix this, we can format Double using formatted().
Stepper("\(sleepAmount.formatted()) hours", value: $sleepAmount, in: 4...12, step: 0.25)
SwiftUI DatePicker Usage #
SwiftUI gives us a special type of picker called DatePicker that can be bound to the date property. Of course, we have a Date type in it.
To use this we can start with a @State property like below.
@State private var wakeUp = Date.now
We can then connect it to a date picker like below.
DatePicker("Please enter a date", selection: $wakeUp)
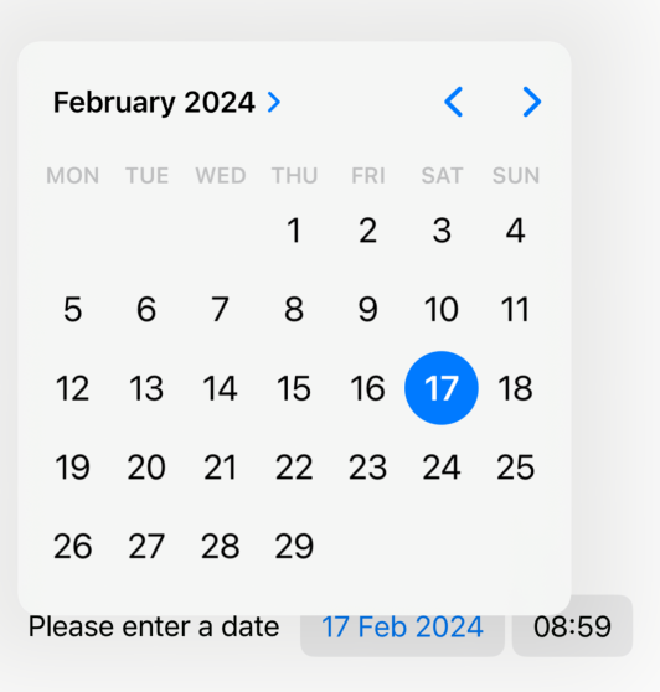
If you examine the screenshot above, you might think that the “Please enter a date” looks ugly and consider replacing it with the code below.
DatePicker("", selection: $wakeUp)
However, if we do this we run into two problems: DatePicker will free up space for a label even if it is empty, and users with screen reader enabled (VoiceOver) will have no idea what the date picker does.
A better alternative to sending empty strings is to use the labelsHidden() modifier as follows.
DatePicker("Please enter a date", selection: $wakeUp)
    .labelsHidden()
The original label is still available for VoiceOver to use, but they no longer appear on the screen.
Date Picker offers a few configuration options for how they will work. We can use displayedComponenets to decide what kind of options the user should see.
- If we do not provide this parameter, users will see the day hour and minute options.
- If we use
.dateusers will see the month, day and year. - If we use
.hourAndMinute, users will only see the hour and minute components.
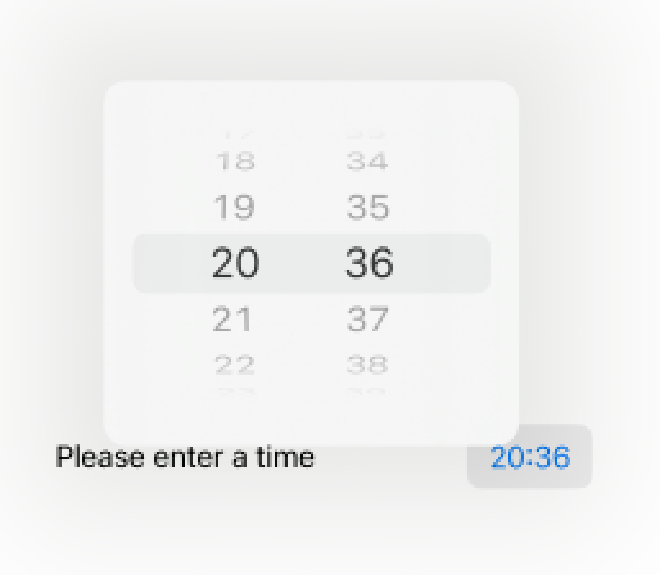
We can select a precise time with the following code.
DatePicker("Please enter a time", selection: $wakeUp, displayedComponents: .hourAndMinute)
Finally there is an in parameter which works in the same way as Stepper. We can give this parameter a date range and the date picker cannot go beyond that.
We’ve been using ranges for a while and we’re used to seeing things like 1...5 or 0...<10, but in Swift we can also use date with range.
func exampleDates() {
    // create a second Date instance set to one day in seconds from now
    let tomorrow = Date.now.addingTimeInterval(86400)

    // create a range from those two
    let range = Date.now...tomorrow
}
With DatePicker this is really useful, but there is something even better. Swift allows us to create one-sided ranges. Ranges where we specify either the beginning or the end but not both.
For example, we can create a date picker like the one below.
DatePicker("Please enter a date", selection: $wakeUp, in: Date.now...)
The code above allows all future dates, but none of the past dates. We can read this as “from the current date to anything”.
Working with Date Type #
Getting users to enter dates is as easy as binding a @State property of type Date to DatePicker, but then things get a bit more complicated.
Let’s look at this simple example;
let now = Date.now
let tomorrow = Date.now.addingTimeInterval(86400)
let range = now...tomorrow
The code above creates an interval from today until the same time tomorrow (86400 is the number of seconds in a day)
This may seem easy enough, but do all days have 86400 seconds? Think of daylight saving time, the clocks sometimes go forward and sometimes backward, so on those days we might have 23 or 25 hours.
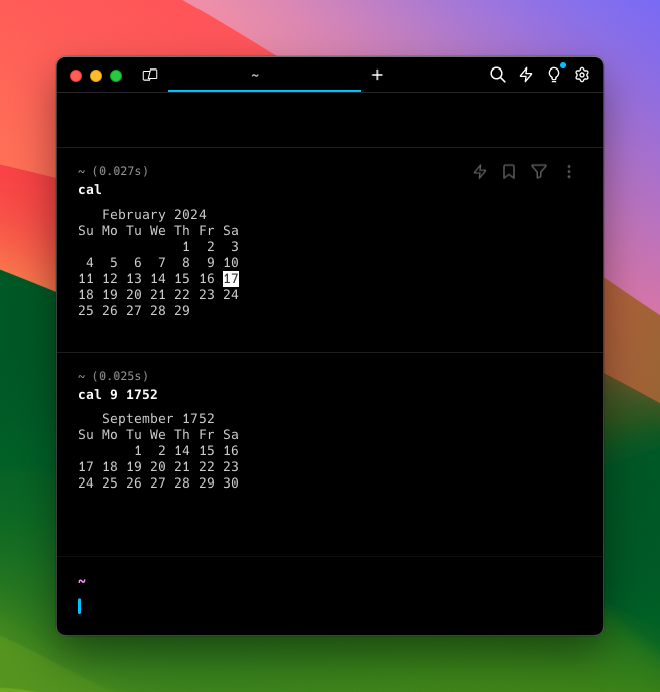
In the image below you can see 2 calendars created in the terminal with the commands cal and cal 9 1752. But you will notice that the second calendar is missing 12 days due to the change from Julian to Gregorian.
We have to rely on Apple’s frameworks, as history processing can be a bit complex.
In our project (BetterRest) we will use dates in three ways;
- It makes sense to choose a default “wake up” time.
- Read the hour and minute they want to wake up.
- Properly demonstrating recommended bedtimes.
We could do all this manually if we wanted to, but then we would have to think about daylight saving time, leap seconds and the Gregorian calendar.
It is both easier and much better to leave all this to iOS.
Let’s consider each of these individually, starting with choosing a reasonable wake-up time.
As you can see, Swift gives us Date to work with dates and that covers year, month, date, hour, minute, second, time zone and more. However, we don’t want to think about most of that, we want to say “whatever day it is today, give me the time to wake up at 8 am”.
Swift has a different type called DateComponenets for this purpose. This type allows us to read or write certain parts of a date instead of the whole date.
So, if we want a date representing 8 am today, we can write a code like this;
var components = DateComponents()
components.hour = 8
components.minute = 0
let date = Calendar.current.date(from: components)
Due to difficulties with date validation, the date(from:) method actually returns an optional date. It is therefore a good idea to use nil coalescing to say “if this fails, give me back the current date”.
let date = Calendar.current.date(from: components) ?? .now
The second challenge is how to read the time they want to wake up. Remember that DatePicker depends on a Date which gives us a lot of information. We therefore need to find a way to pull only the hour and minute components.
Again, DateComponents comes to the rescue. We can ask iOS to provide certain components of a date and then read them back. Because of the way DateComponents works, there can be a disconnect between the values we ask for and the values we get. We can ask for hours and minutes, but we will be given back an optional DateComponents instance for all properties. Yes we know the hour and minute will be there because that’s what we wanted, but we still need to unwrap the optional values or provide default values.
So we can write a code like this;
let components = Calendar.current.dateComponents([.hour, .minute], from: someDate)
let hour = components.hour ?? 0
let minute = components.minute ?? 0
The last challenge is how to format dates and times and here we have two options
The first is to rely on the format parameter, which has worked very well for us in the past. Here we can say which parts of history we want to show.
For example, if we wanted to get only the time from a date, we would write that;
Text(Date.now, format: .dateTime.hour().minute())
Or if we want the day, month and year, we need to write that;
Text(Date.now, format: .dateTime.day().month().year())
You might wonder how this adapts to handling different date formats. For example, in Turkey we use day/month/year, but some countries use month/day/year. The nice thing is that we don’t have to worry about this. When we type day().month().year(), instead of editing the data, we ask for it and iOS automatically formats it using the user’s preferences.
Alternatively, we can use the formatted() method directly on dates and pass the configuration options for how we want both the date and time to be formatted as follows;
Text(Date.now.formatted(date: .long, time: .shortened))
Model Training with Create ML #
On-device machine learning is surprisingly easy thanks to two Apple Frameworks: Core ML and Create ML. The former allows us to build apps using machine learning, while the latter allows us to build our own custom machine learning models. As a result of all this work, anyone can now add machine learning to their apps.
Core ML can perform various tarining tasks such as recognizing images, sounds and even gestures, in this example we will look at tabular regression. This is a common name in machine learning, where we can throw spreadsheet-like data at Create ML and ask it to find the relationship between various values.
Machine learning is done in two steps: we train the model and then we ask the model to make predictions. Training is the process of the computer looking at all our data to find the relationship between all the values we have and can take a long time with large data sets. Prediction is done on the device, i.e. we give the trained model data and ask it to make predictions about new data.
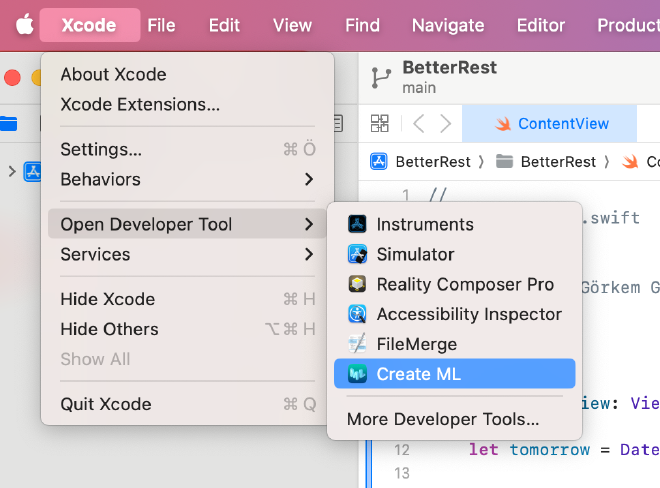
Now let’s start the training process. We can start the Create ML application by going to the XCode menu and selecting Open Developer Tool > Create ML.
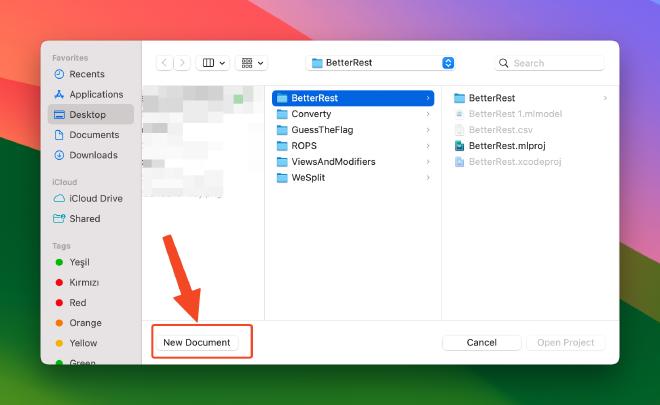
On the page that opens, click New Document.
In the window that opens, select Tabular Regression and click next.

Type BetterRest for the project name and press next, select the location and click create.
First, we will provide Create ML with some training data. This is the raw statistics that Create ML needs to look at, and in our example it consists of four values: when it wants to wake up (wake), how much sleep it wants to get (estimatedSleep), how much coffee it drank (coffee), how much sleep it actually got (actualSleep)
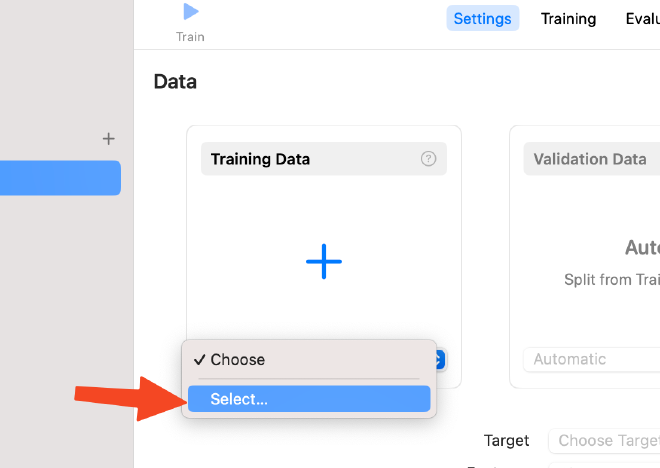
This data is contained in the file BetterRest.csv. This file is the dataset that Create ML can work with and our first job is to import this file. You can do this import from the Training Data tab in the Create ML application as in the screenshot below.
Our next task is to identify the target we want the computer to learn to predict and the features we want to examine.
To do this, select actualSleep for the target and wake , estimatedSleep, coffee for the features as follows.

Under the Parameters section, we can select Algorithm, where we have Automatic, Random Forest, Boosted Tree, Decision Tree and Linear Regression. Each one takes a different approach to analyzing the data. The Automatic option is not always correct, but it is quite sufficient for this project.
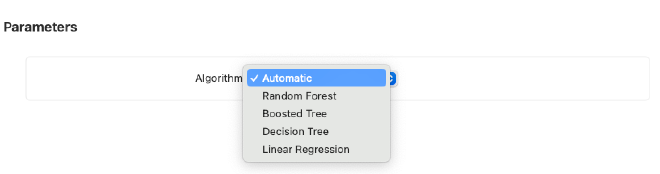
If you want to get a general impression of what algorithms do, check out Paul Hudson’s YouTube video.
After completing these steps, we can click on the Train button in the upper left corner. After a few seconds the process will be complete.
Create ML provides us with both training training and validation statistics and both are important. When we asked it to do training using our data, it automatically split the data. It used one part of it to train the ML model, but then allocated a part for validation. This validation data is then used to check the model. It makes a prediction based on the input, then checks how far that prediction is from the actual value from the data.
Even better, if you go to the Output tab, you will see that our finished model has a size of 545 bytes. CreateML has taken 180Kb of data and reduced it to just 545 bytes. This is possible because Create ML doesn’t actually care what the values are, it only cares what the relationships are. So it learns the best algorithm and stores it.
Now that our model has been trained, we can save our model with the Get button in the upper right corner of the Output tab.
You can also read this article in Turkish.
Bu yazıyı Türkçe olarak da okuyabilirsiniz.