
During Project-1, we will get an introduction to the basics of SwiftUI. Throughout the project, we will create an application called WeSplit. This application divides the bill by the number of people in order to pay the bill jointly and calculates the tip. In today’s article, we will examine the concepts of Form, NavigationStack and @State.
This project is also available on GitHub.
GitHub - GorkemGuray/WeSplit: 100 Days of SwiftUI - Project-1
How to Create a New SwiftUI Project in Xcode #
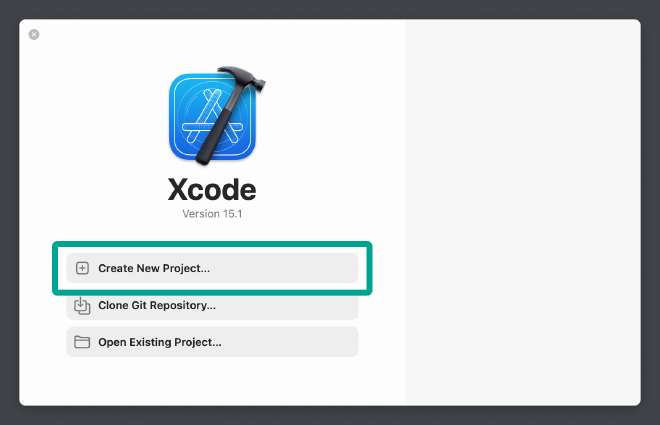
Launch Xcode and then select “Create New Project”.
Here we will be presented with a list of options, first select iOS and then App and press the Next button.
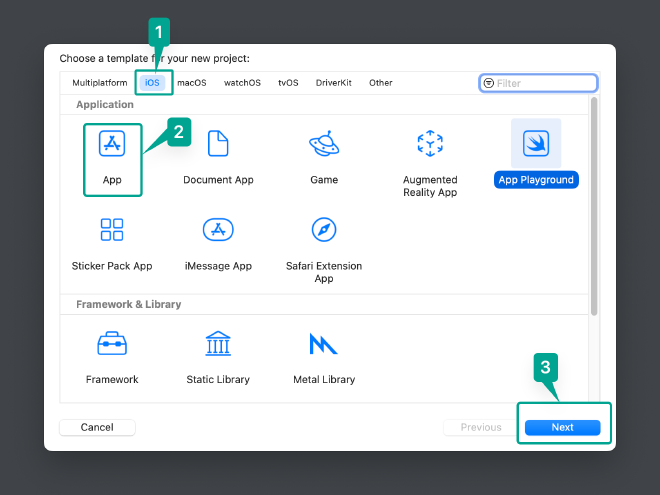
We will see a screen like the one below;
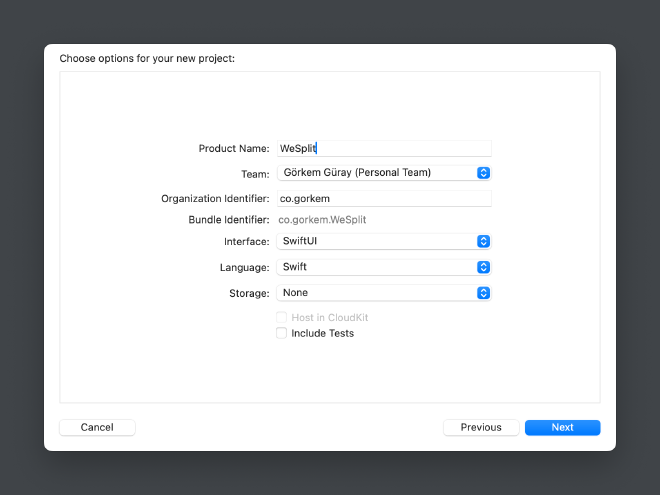
What we need to do on this screen;
- For Product Name, enter “WeSplit”.
- For Organization Identifier you can enter whatever you want, but if you have a website you should enter the components inverted “gorkem.co” will be “co.gorkem”. If you don’t have a domain name, you can also enter “me.surname.name” in this section.
- Select SwiftUI for Interface.
- Select Swift for Language.
- Select None for Storage.
- Make sure that all the checkboxes at the bottom are unchecked.
Basic Structure of a SwiftUI Application #
In Xcode, the section on the left is called project navigator. Here are the files we will see;
- WeSplitApp.swift : Contains the code to start the application (launch). If we want to create something when the application is launched and keep it alive while the application is running, we need to put it here.
- ContentView.swift : Contains the first user interface (UI) for our application and is where we will do all the work in this project.
- Asset.xcassets : is the asset catalog. Asset is a collection of images that we want to use in the application. Here we can add colors, app icons, iMessage stickers, etc.
- Preview Content : This is a group. It contains Preview Assets.xcassets. This is another asset catalog. But this time it’s for sample images that we want to use when designing user interfaces, giving us an idea of what they might look like when the application is running.
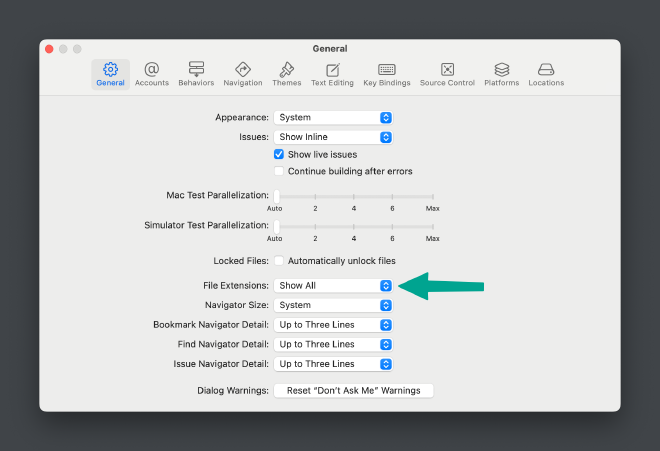
Note : If you don’t see the extensions of your files in Project navigator, check the File Extension option in Xcode > Settings > General tab.
All our work for this project will take place in the ContentView.swift file that Xcode created for us. Below is the code that Xcode created in this file;
import SwiftUI

struct ContentView: View {
    var body: some View {
        VStack {
            Image(systemName: "globe")
                .imageScale(.large)
                .foregroundStyle(.tint)
            Text("Hello, world!")
        }
        .padding()
    }
}

#Preview {
    ContentView()
}
Before we start writing our own code, let’s review what all this does.
-
import SwiftUI: tells Swift that we want to use all the functionality given to us by the SwiftUI Framework. Apple provides us with many frameworks; machine learning, audio playback, image processing and many more. So instead of assuming that our program wants to use everything, we tell it which parts we want to use, so that only those parts can be loaded. -
struct ContentView: Viewcreates a new struct calledContentViewand says that it conforms to theViewprotocol.Viewcomes from the SwfitUI we imported above and is the basic protocol that must be adopted by everything we want to draw on the screen. -
var body: some Viewdefines a new computed property calledbodyand this property has an interesting type :some View. This means that our layout will return something that conforms to theViewprotocol. In the background it will end up returning a complex data type that depends on everything in our layout, butsome Viewwill take care of the rest.See also: Opaque Return TypeThe
Viewprotocol has only one requirement, that we have a computed variable calledbodythat returnssome View. We can of course add more properties and methods to our view structs, butbodyis the only one required by the protocol. -
VStackand the code inside it shows an image of a globe with the text “Hello, world!” underneath. This globe image comes from Apple’s SF Symbols icon set. Text views are simple static pieces of text drawn on the screen and can automatically have multiple lines if needed. -
imageScale(),foregroundStyle()andpadding()are methods called on the image andVStack. These methods, which SwiftUI calls modifiers, have a small difference: they always return a new view containing both our original data and any extra changes we want.
Under the ContentView struct, you will see #Preview with ContentView() inside. This won’t actually be part of our app going to the App Store, instead it’s a special piece of code specifically so that Xcode can show a preview of the UI we’ve created.
These previews use an Xcode feature called canvas, which usually appears to the right of our code, we can customize the preview code if we want, this only affects the canvas and does not change the actual application being run.
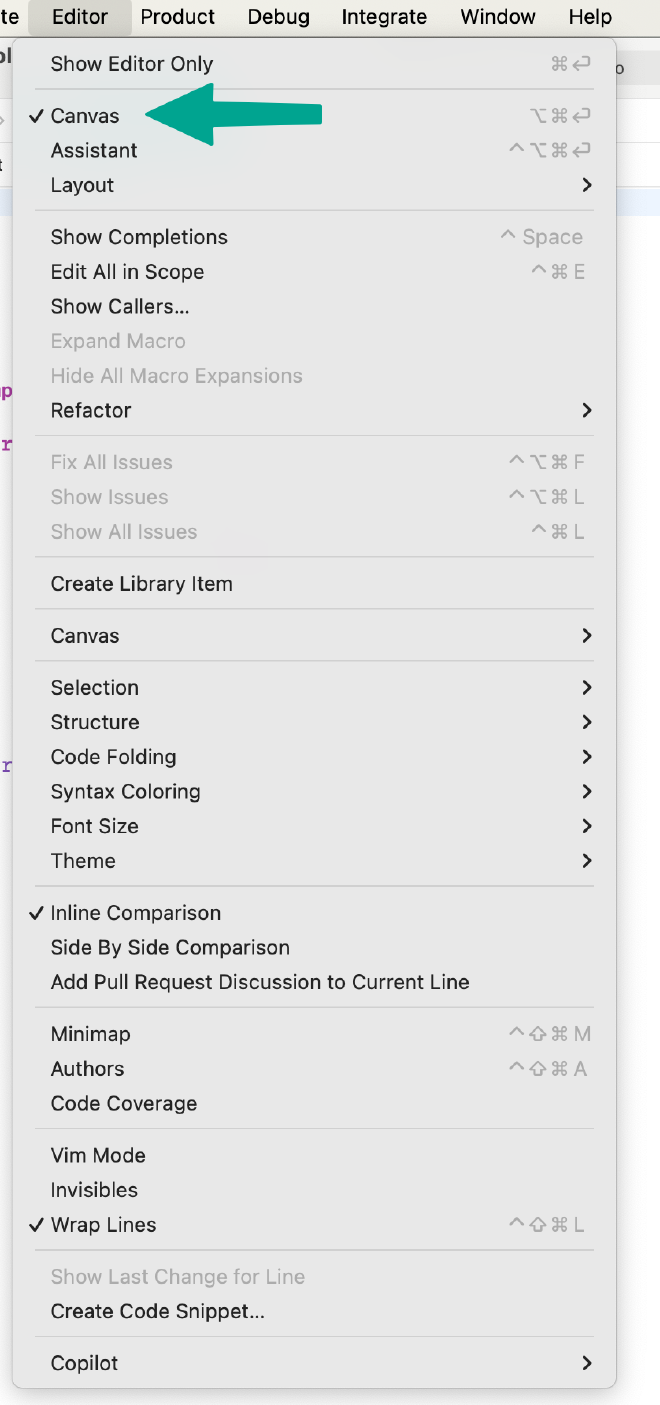
Important : If you don’t see Canvas, you can select Canvas from the Editor menu in the Xcode window.
Many times we will see that a bug in our code stops Xcode from updating the canvas. To fix this we can use the refresh button or the keyboard shortcut Option+Cmd+P.
SwiftUI Form Creation #
Many applications require their users to enter some kind of input. SwiftUI provides us with a special view called Form for this. Forms are scroll lists of static controls like text and images. But they can also contain user interactive controls like text field, toggle switch, button, etc.
We can create a basic Form by putting a text view inside a Form like below.
var body: some View {
    Form {
        Text("Hello, world!")
    }
}
When we look at the Xcode canvas, we can see that it has changed a lot;
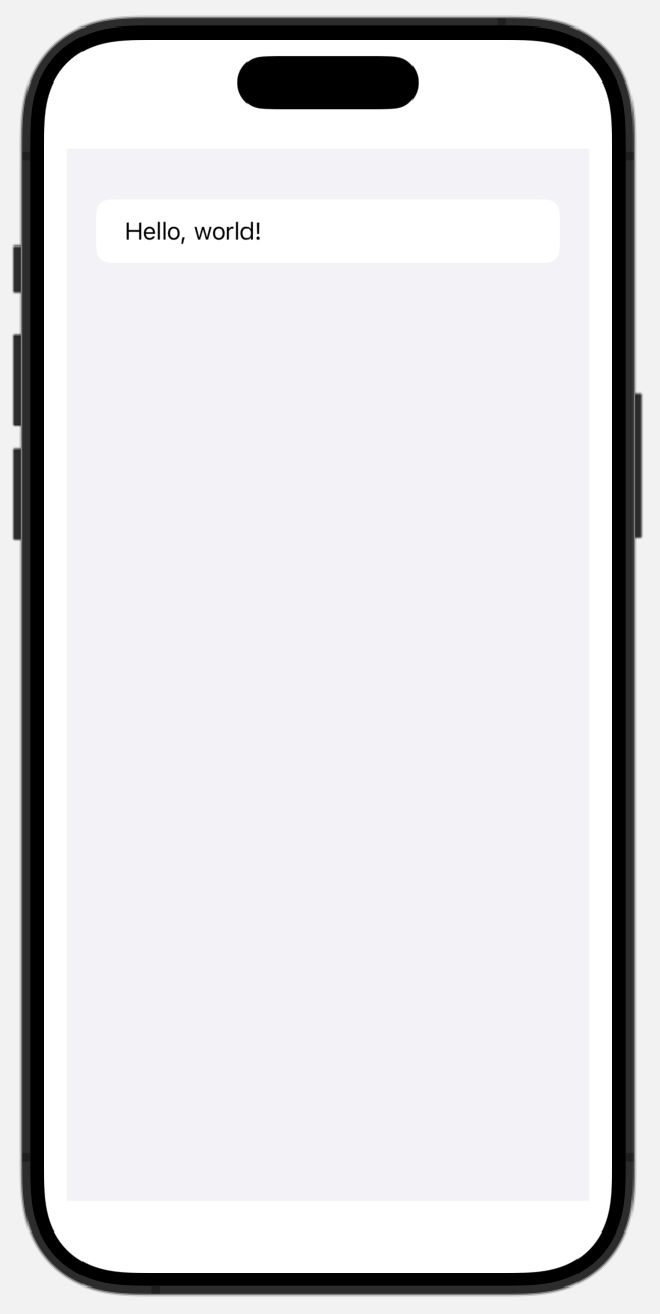
Here we see the start of a list, just like we would see in the Settings app. We can add even more rows;
Form {
    Text("Hello, world!")
    Text("Hello, world!")
    Text("Hello, world!")
}
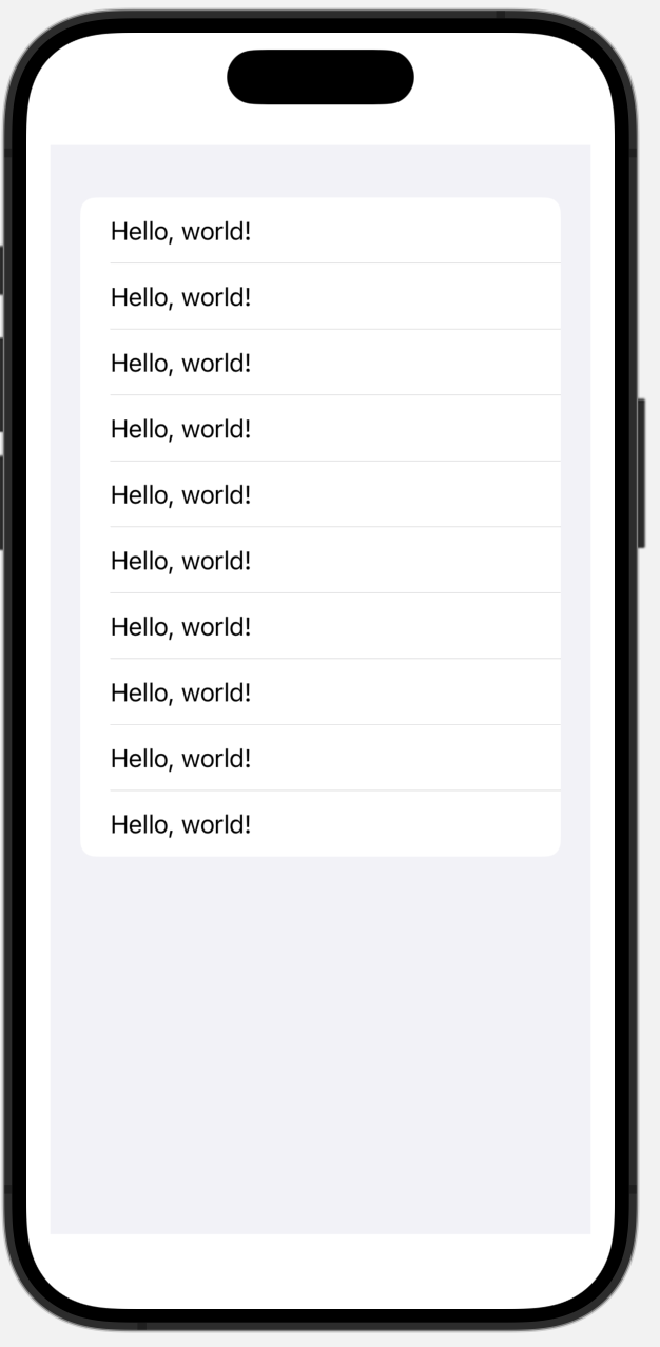
In fact, we can have as many things inside a form as we want, for example this code will display a list of ten lines.
Form {
    Text("Hello, world!")
    Text("Hello, world!")
    Text("Hello, world!")
    Text("Hello, world!")
    Text("Hello, world!")
    Text("Hello, world!")
    Text("Hello, world!")
    Text("Hello, world!")
    Text("Hello, world!")
    Text("Hello, world!")
}
If we want to divide our Form into visual parts, just like in the Settings application, we can use Section.
Form {
    Section {
        Text("Hello, world!")
    }

    Section {
        Text("Hello, world!")
        Text("Hello, world!")
    }
}
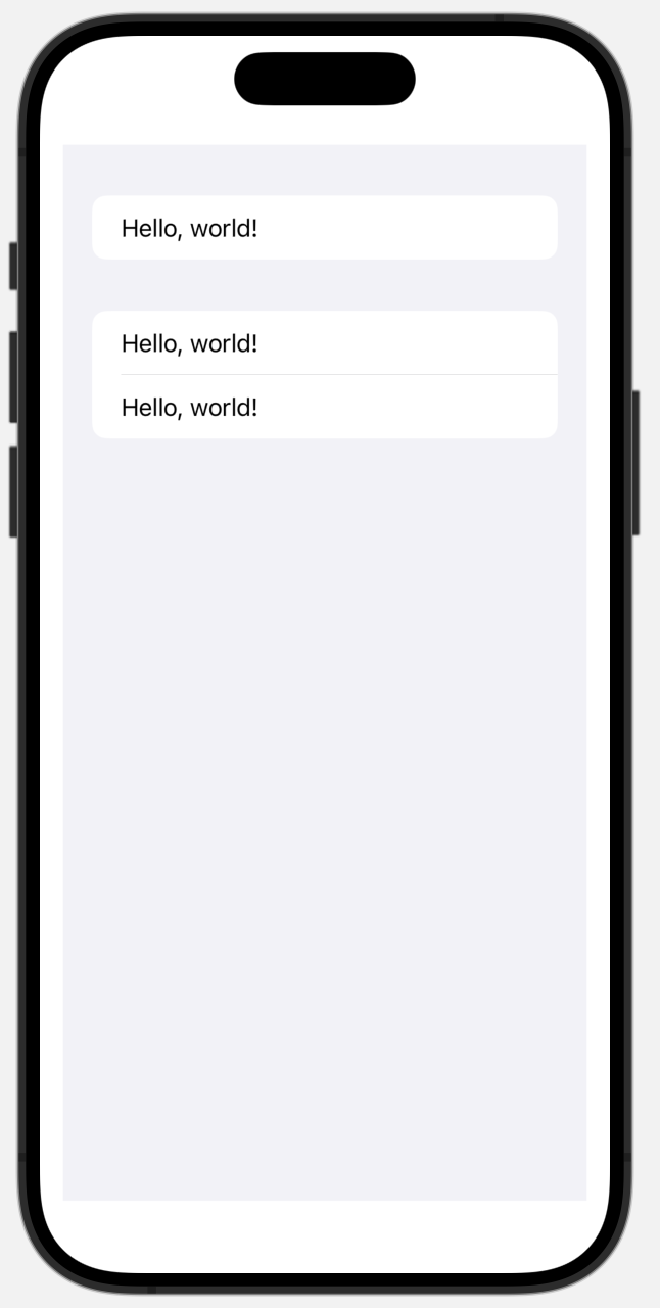
There is no hard and fast rule about when to divide a form into sections. It exists only to visually group related elements.
Adding SwiftUI Navigation Bar #
iOS allows us to sail content anywhere on the screen, including under the system clock at the top and the home screen indicator at the bottom. But if we use all of these areas, it can look unpleasant. For this reason, SwiftUI defaults to placing components in an area where they won’t be blocked by the system UI or the rounded corners of the device. This area is called the safe area.
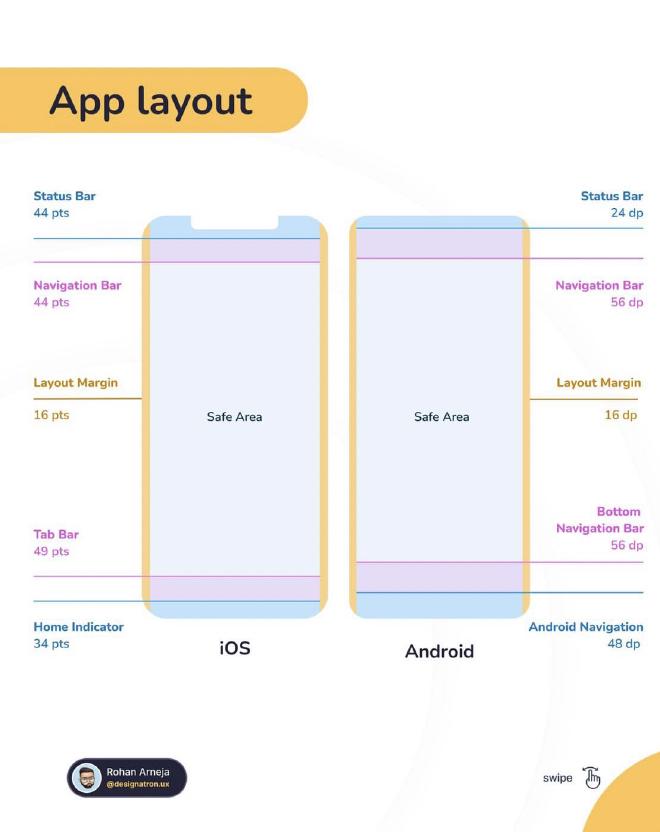
On iPhone 15, the safe area covers the area from just below the dynamic island to just above the home screen indicator. We can easily see this with a code like this.
Let’s run this code in the iOS simulator. To run the simulator we can press the play button at the top left of the Xcode window or use the Cmd+R shortcut.
You will see that the form starts below the dynamic island, so by default the row in our form is fully visible. Forms can be scrolled, if we scroll the form upwards in the simulator, we can move the line up so that it goes under the clock, which we don’t want. Because it would make both difficult to read.
A common way to fix this is to add a navigation bar at the top of the screen. The navigation bar can have titles and buttons. It also gives us the ability to show new views when the user performs an action in SwiftUI.
We can add the navigation bar like this.
var body: some View {
    NavigationStack {
        Form {
            Section {
                Text("Hello, world!")
            }
        }
    }
}
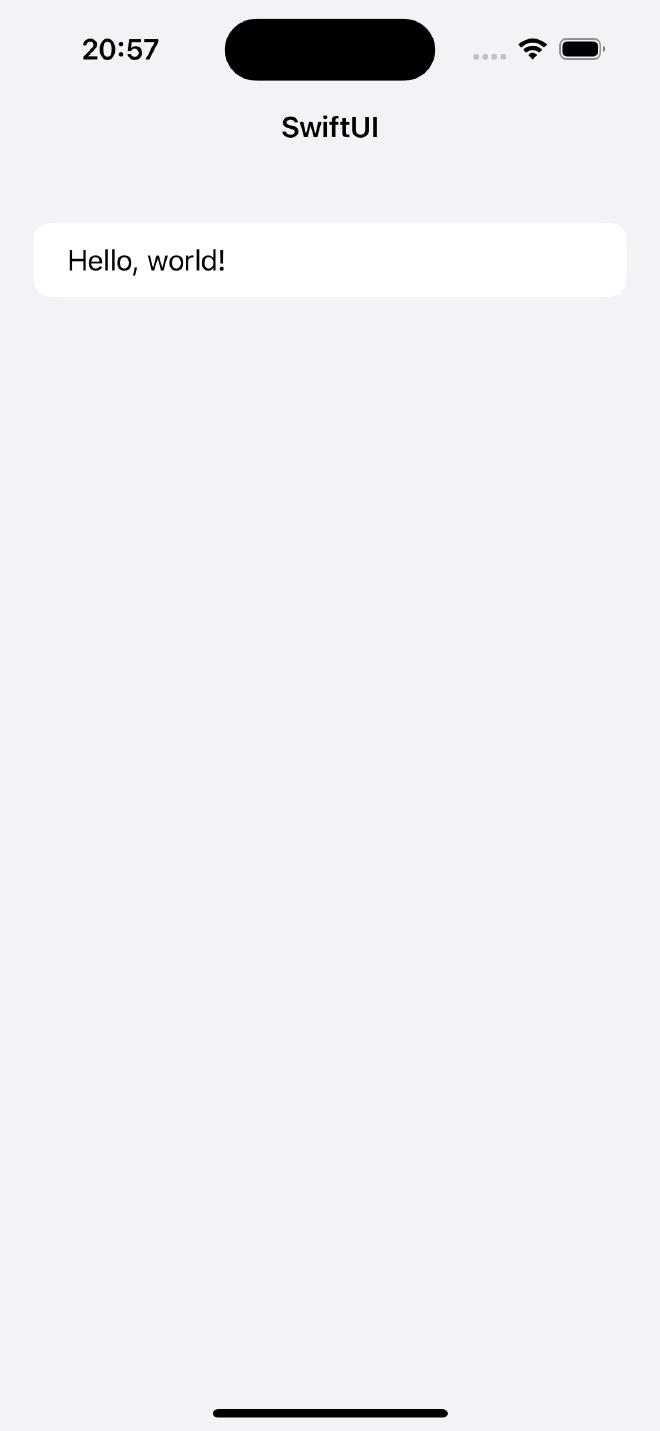
When we write the code above, it will look exactly the same as the previous one. But we usually use a title in navigation bars. We can add this title with the help of modifier.
NavigationStack {
    Form {
        Section {
            Text("Hello, world!")
        }
    }
    .navigationTitle("SwiftUI")
}
When we add the .navigationTitle() modifier to the form, Swift actually creates a new form with a navigation bar and all the existing content we provided.

When we add a title to the navigation bar, we will notice that a large font is used for this title. We can get a small font by adding another modifier.
.navigationBarTitleDisplayMode(.inline)
What is SwiftUI State? Changing Program State #
Views are a function of their state
When we say that SwiftUI’s views are a function of their state, we mean that how the user interface looks is determined by the state of our program. For example, users cannot touch the Continue button until they enter their name in a text field.
We can illustrate this with a button that has a name and an action closure to be executed when tapped.
struct ContentView: View {
    var tapCount = 0

    var body: some View {
        Button("Tap Count: \(tapCount)") {
            tapCount += 1
        }
    }
}
This code looks quite reasonable: Create a button that says “Tap Count” and specify how many times the button is tapped, then add 1 to the variable tapCount each time the button is tapped.
However, this code will not be compiled by Xcode. As you can see, ContentView is a struct that is created as a constant. If we remember what we learned about structs, this means that it is immutable (immutable) (we cannot freely change its values).
When creating struct methods that want to change their properties, we need to add the mutating keyword: mutating func doSomeWork(). But Swift doesn’t allow us to make mutated computed property, which means we can’t write mutating var body: some View.
This may seem like we have reached an impasse: We want to be able to change values while our program is running, but Swift won’t let us because views are structs.
Fortunately, Swift offers us a special solution called a property wrapper: a special attribute that we can place in front of our properties, giving them superpowers. To store simple program states, such as how many times a button has been touched, we can use a *property wrapper called @State from SwiftUI as follows.
struct ContentView: View {
    @State var tapCount = 0

    var body: some View {
        Button("Tap Count: \(tapCount)") {
            self.tapCount += 1
        }
    }
}
This small change is enough to make our program work. Now we can build and compile it.
@State allows us to overcome the limitations of structs. Since structs are constants we know that we cannot change their properties, but @State allows this value to be stored separately in a place where it can be modified by SwiftUI.
**There are several ways to store program state in SwiftUI. @State is specifically designed for simple properties that are stored in a single view. As a result, Apple recommends that we add private access control to these properties as follows.
@State private var tapCount = 0
Binding State to User Interface Controls #
SwiftUI’s @State property wrapper allows us to freely modify view structs. This means that as our program changes, we can update the view properties accordingly.
However, things are a bit more complicated with user interface controls. For example, if we want to create an editable text box that users can type into, we can create a SwiftUI view like the one below.
struct ContentView: View {
    var body: some View {
        Form {
            TextField("Enter your name")
            Text("Hello, world!")
        }
    }
}
The code above tries to create a text field and a text view. However, the code cannot compile because SwiftUI wants to know where to store the text in the text field.
Remember that views are a function of their state. This text field can only show something if it reflects a value stored in our program. What SwiftUI wants is a string property in the struct that can be shown in the text field and will store everything the user types into the text field.
We can make a change like this;
struct ContentView: View {
    var name = ""

    var body: some View {
        Form {
            TextField("Enter your name", text: name)
            Text("Hello, world!")
        }
    }
}
This adds the name property and then uses it to create the text field. However, the code still won’t work because Swift needs to be able to update the name property to match whatever the user types into the text field. For this reason, we can use @State as follows.
@State private var name = ""
But this is still not enough and our code still doesn’t compile.
The problem is that Swift distinguishes between “show the value of this property here” and “show the value of this property here, but write all changes back to the property”.
In the case of the Text Field, Swift needs to make sure that everything present in the text is also present in the name property, so that it can fulfill its promise that our views are a function of their state.
This is called two-way binding. We bind the text field to show the value of our property, but we also bind it in such a way that any change to the text field updates the property.
In Swift, we mark these two-way bindings with a special symbol to make them more visible: $
This tells Swift that it should read the value of the property, but also write it back if anything changes.
So the correct version of struct is as follows.
struct ContentView: View {
    @State private var name = ""

    var body: some View {
        Form {
            TextField("Enter your name", text: $name)
            Text("Hello, world!")
        }
    }
}
Before we continue, let’s change the text view to show the user’s name directly below the text field;
Text("Your name is \(name)")
Notice that this is used as name instead of $name? This is because we want two-way binding here. We want to read the value yes, but we don’t want to write it back somehow, because this text view will not change.
So, when we see $ before a property name, we must remember that this is a two-way binding: the value of the property is read and written at the same time.
Creating a View in a Loop #
It is common to want to create several SwiftUI views in a loop. For example, we might want to loop over an Array of names and have each one be a text view.
SwiftUI provides us with a special view type called ForEach for this purpose. This can loop over Array and range to create as many views as needed.
ForEach runs the closure once for each element it loops over and passes the current loop element. For example, if we loop from 0 to 100, first 0, then 1, then 2 and so on.
For example, this creates a form with 100 lines;
Form {
    ForEach(0..<100) { number in
        Text("Row \(number)")
    }
}
Since ForEach is passed as a parameter into the closure, we can use short syntax for the parameter name as follows.
Form {
    ForEach(0 ..< 100) {
        Text("Row \($0)")
    }
}
ForEach is especially useful when working with SwiftUI’s Picker view. Picker allows us to show various options for users to choose from.
We will define a view to show this;
- It has an Array of possible student names.
- It has an
@Stateproperty that stores the currently selected student. - Creates a
Pickerview that asks users to pick their favorites and uses two-way binding to the@Stateproperty. - Uses
ForEachto loop over all possible student names and converts them to a text view.
Here is the code;
struct ContentView: View {
    let students = ["Harry", "Hermione", "Ron"]
    @State private var selectedStudent = "Harry"

    var body: some View {
        NavigationStack {
            Form {
                Picker("Select your student", selection: $selectedStudent) {
                    ForEach(students, id: \.self) {
                        Text($0)
                    }
                }
            }
        }
    }
}
There is not much code here, but some things need to be clarified;
- The
studentsArray does not need to be marked with@Statebecause it is a constant and will not change. selectedStudentproperty starts with the value “Harry” but can change, so it is marked with@State.Pickerhas a label “Select your student” which tells users what it is doing and is also a descriptive text for screen readers.Pickerhas a two-way binding toselectedStudent, i.e. it will start showing the selection “Harry” but will update the property when the user selects something else.- In
ForEachwe loop over all students Array. - For each student, we create a text view showing the name of that student.
The only confusing part here is this: ForEach(students, id: \.self) This loops over the students Array so we can create a text view for each one, but the id: \.self part is important. Because SwiftUI needs to be able to uniquely identify each view on the screen so that it can detect when things change.
For example, if we arrange the array with Ron first, SwiftUI will move the text view at the same time. Therefore, we need to tell SwiftUI how it can uniquely identify each element in the string array. What makes each string unique?
We have an array of just simple strings and the only unique thing about the string is the string itself. Each string in the array is different, so strings are naturally unique.
So when we use ForEach to create many views and SwiftUI asks us what identifier makes each item in the string array unique, our answer will be \.self, meaning “the strings themselves are unique”. Of course, this means that we might have problems if we add duplicate strings to the students array, but in this example there are no problems.
You can also read this article in Turkish.
Bu yazıyı Türkçe olarak da okuyabilirsiniz.