

In this section we will see how to send and receive data over the internet using URLSession.
Checking for a Valid Address #
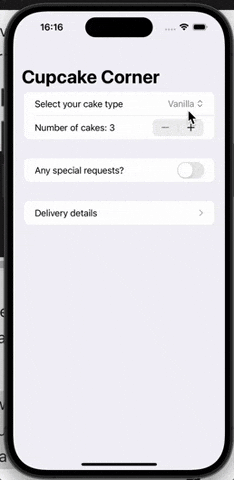
The second step in our project will be to allow the user to enter their address into a form, but we will add some validation as part of this - we only want to move to the third step if their address looks good.
We can accomplish this by adding a Form to the AddressView struct we created earlier, which will contain four text fields: name, street address, city and zip. We can then add a NavigationLink to move to the next screen where the user will see the last price and can checkout.
We will start by adding a new view called CheckoutView. This view will be pushed by the address view. For now we will treat it as a placeholder.
Create a new SwiftUI view called CheckoutView and give it the same Order property and preview that AddressView has.
struct CheckoutView: View {
    var order: Order

    var body: some View {
        Text("Hello, World!")
    }
}

#Preview {
    CheckoutView(order: Order())
}
We’ll come back to this later, but first let’s implement the AddressView. As I said, this needs to have a form with four text files linked to four properties from our Order object and a NavigationLink that passes the control to the checkout view.
First, we need four new properties in Order to store the delivery details
var name = ""
var streetAddress = ""
var city = ""
var zip = ""
Now replace the existing body of AddressView with this one;
Form {
    Section {
        TextField("Name", text: $order.name)
        TextField("Street Address", text: $order.streetAddress)
        TextField("City", text: $order.city)
        TextField("Zip", text: $order.zip)
    }

    Section {
        NavigationLink("Check out") {
            CheckoutView(order: order)
        }
    }
}
.navigationTitle("Delivery details")
.navigationBarTitleDisplayMode(.inline)
As you can see, this passes our order object one level deeper, to CheckoutView, which means we now have three views pointing to the same data.
This code will lead to many errors, but it only takes a small change to fix them, change the order property to;
@Bindable var order: OrderPreviously, you saw how Xcode allows binding to native @State properties even if those properties are classes that use @Observable macros. This is because the @State property wrapper automatically creates a two way binding for us, which we access through the $ syntax.
In AddressView we didn’t use @State because we don’t create the class here, we just get it from somewhere else. This means that SwiftUI doesn’t have access to the two way binding we normally use, which is a problem.
Now, we know that this class uses the @Observable macro, which means that SwiftUI can monitor this data for changes. So what the @Bindable property wrapper does is to create the missing bindings for us. That is, it generates two way bindings that can work with the @Observable macro without having to use @State to generate local data. It is perfect here and you will use it a lot in your future projects.
Go ahead and run the application again, because I want you to see why all this is important. Enter some data on the first screen, enter some data on the second screen, then go back to the beginning and try to move forward
What you should see is that no matter what screen you are on, all the data you enter remains saved. Yes, this is a natural side effect of using a class for our data, but it’s a feature we gain without having to do any work in our application. If we had used local state, all the address details we entered would have been lost when we returned to the original view.
Now that AddressView is working, it’s time to stop the user from proceeding to the checkout page unless some condition is met. Which condition? That’s for us to decide. Although we can write length controls for each of the four text fields, this often misleads people. Some names may be too short.
Instead, we will check if the name, streetAddress, city and zip properties of our order are empty. I prefer to add this kind of complex check inside my data, which means we need to add a new calculated property like this to Order.
var hasValidAddress: Bool {
    if name.isEmpty || streetAddress.isEmpty || city.isEmpty || zip.isEmpty {
        return false
    }

    return true
}
Now we can use this condition with SwiftUI’s disabled() modifier.
In our case, the condition we want to check is the hasValidAddress computed property we just wrote. If this property is false, the section of the form containing our NavigationLink should be disabled, because users need to fill in the delivery information first.
So, let’s add this modifier to the end of the second section in the AddressView;
.disabled(order.hasValidAddress == false)The code should look like this.
Section {
    NavigationLink("Check out") {
        CheckoutView(order: order)
    }
}
.disabled(order.hasValidAddress == false)
If you run the app now, you’ll see that it needs to contain at least one character in all four text fields to continue. Even better, SwiftUI automatically gray out the button when the condition is not true, giving the user clear feedback on whether it is interactive or not.
Preparation for Checkout #
The last screen in our application is the CheckoutView and it consists of two parts. The first half is the basic UI, which will provide little real challenge for you, but the second half is completely new. We need to encode our Order class into JSON, send it over the internet and get a response.
We’ll look at the whole encoding and transferring thing soon, but first let’s cover the easy part: Giving CheckoutView a user interface. More specifically, we will create a ScrollView with an image, the total price of their order and a Place Order button to start networking.
For the image, I uploaded a cupcake image to my server that we will get remotely with AsyncImage. We can store it in the app, but having a remote image means we can dynamically change it for seasonal alternatives and promotions.
As for the order cost, we actually don’t have any pricing for our cakes in our database, so we can only invent one. The pricing we will use is as follows.
- There is a base price of $2 per cupcake.
- For more complex cakes we will add a little to the price.
- Extra icing will cost $1 per cupcake.
- Adding decorations will cost another 50 cents per cupcake.
We can collect all this logic in a new computed property for Order as follows.
var cost: Decimal {
    // $2 per cake
    var cost = Decimal(quantity) * 2

    // complicated cakes cost more
    cost += Decimal(type) / 2

    // $1/cake for extra frosting
    if extraFrosting {
        cost += Decimal(quantity)
    }

    // $0.50/cake for sprinkles
    if addSprinkles {
        cost += Decimal(quantity) / 2
    }

    return cost
}
The actual view itself is simple: we will use a VStack in a vertical ScrollView, then our image, the cost text and the button to place an order.
We will return to the action part of the button, let’s first complete the basic layout. Let’s replace the existing body of the CheckoutView with this one;
ScrollView {
    VStack {
        AsyncImage(url: URL(string: "https://hws.dev/img/[email protected]"), scale: 3) { image in
                image
                    .resizable()
                    .scaledToFit()
        } placeholder: {
            ProgressView()
        }
        .frame(height: 233)

        Text("Your total is \(order.cost, format: .currency(code: "USD"))")
            .font(.title)

        Button("Place Order", action: { })
            .padding()
    }
}
.navigationTitle("Check out")
.navigationBarTitleDisplayMode(.inline)
This should all be old news to you by now, but before we’re done with this screen I want to show you a small but useful SwiftUI modifier that we can add here: scrollBounceBehavior()
Using a scroll view is a nice way to make the layout work great no matter what Dynamic Type size the user has enabled, but it creates a small annoyance: when views fit exactly on a single screen, they still bounce a bit when the user moves up and down on them.
The scrollBounceBehavior() modifier helps us disable this bouncing when there is nothing to scroll. Add this under .navigationBarTitleDisplayMode(.inline).
.scrollBounceBehavior(.basedOnSize)This way we will get a nice scroll bounce when we actually have scrolling content, otherwise the scroll view behaves as if it is not there.
Now that we’ve finished this part, we can move on to the last part, networking.
Sending and Receiving Data Over the Internet #
iOS comes with some great functionality for managing networks, in particular the URLSession class makes sending and receiving data surprisingly easy. If we combine converting Swift objects to and from JSON with Codable, we can use a new URLRequest struct to configure exactly how the data should be sent, with about 20 lines of code we can achieve great things.
First, let’s create a method that we can call from our Place Order button, add it to the CheckoutView;
func placeOrder() async {
}
Just like when downloading data using URLSession, uploading is done asynchronously.
Now change the Place Order button as follows;
Button("Place Order", action: placeOrder)
    .padding()
This code will not work, and Swift will make it quite clear why: an asynchronous function is being called from a function that does not support asynchronous. This means that our button expects to be able to execute the action immediately and doesn’t understand how to wait for something asynchronous. Even if we write await placeOrder() it won’t work, because the button doesn’t want to wait.
I mentioned earlier that onAppear() doesn’t work with these asynchronous functions and that we should use the task() modifier instead. This isn’t an option here since we’re executing an action instead of just adding a modifier, but Swift offers an alternative: we can create a new task out of thin air and just like the task() modifier, it will execute any asynchronous code we want.
In fact, all we need to do is to place our await call inside a task like the one below.
Button("Place Order") {
    Task {
        await placeOrder()
    }
}
And now everything is ready, this code will call the placeOrder() method asynchronously. Of course, this function doesn’t actually do anything yet, so let’s fix that now.
We need to do three things in placeOrder();
- Convert our existing order object into some JSON data that can be shipped.
- Tell Swift how to send this data via a network call.
- Run this request and process the response.
The first one is simple, so let’s start with it. We will use JSONEncoder to archive our order by adding this code to placeOrder();
guard let encoded = try? JSONEncoder().encode(order) else {
    print("Failed to encode order")
    return
}
This code will not work yet because the Order class does not conform to the Codable protocol. This is an easy change though, let’s change the class definition to
class Order: Codable {The second step is to use a new type called URLRequest. This type is like a URL that gives us options to add extra information such as request type, user data, etc.
We need to add the data in a very specific way for the server to process it correctly, which means we need to provide two extra data beyond our order.
- The HTTP method of a request determines how the data is sent. There are several HTTP methods, but in practice GET (“I want to read data”) and POST (“I want to write data”) are used a lot. Here we want to write data, so we will use POST.
- The content type of a request determines what kind of data is being sent, which in turn affects the way the server handles our data. This is specified in a type called the MIME type, which was originally made for sending attachments in emails, and has several thousand highly specific options.
Therefore, the next code for placeOrder() would be to create a URLRequest object and then configure it to send the JSON data using an HTTP POST request. We can then use this to load our data using URLSession and process what comes back.
The question of course is where to send our request. We will use a really useful website called https://reqres.in, which allows us to send any data we want and automatically sends it back. This is a great way to prototype network code because you get the actual data back from everything you send.
Add this code now to the placeOrder() method;
let url = URL(string: "https://reqres.in/api/cupcakes")!
var request = URLRequest(url: url)
request.setValue("application/json", forHTTPHeaderField: "Content-Type")
request.httpMethod = "POST"
The first line contains a force unwrap for the URL(string:) initializer, which means “this returns an optional URL, but force it to not be optional.” Creating URLs from strings can fail because we might add some nonsensical expressions, but here I wrote the URL manually, so I can see it will always be correct.
At this point, there is a new method called URLSession.shared.upload(), and we are ready to make our network request using the URL request we just made. Now go ahead and add this to placeOrder();
do {
    let (data, _) = try await URLSession.shared.upload(for: request, from: encoded)
    // handle the result
} catch {
    print("Checkout failed: \(error.localizedDescription)")
}
Now let’s get to the important part: we need to read the result of our request for times when everything works correctly. If something goes wrong, perhaps because there is no internet connection, our catch block will be executed, so there’s no need to worry about that here.
Since we are using ReqRes.in, we will actually get back the same order we sent, which means we can use JSONDecoder to convert it into an object from JSON.
To verify that everything worked correctly, we’ll show an alert containing some details of our order, but we’ll use the decoded order that we received back from ReqRes.in. Yes, it should be the same as what we sent, and if not, we must have made a mistake in encoding.
Displaying an alert requires properties to store the message and whether it is visible, so please add these two new properties to CheckoutView now;
@State private var confirmationMessage = ""
@State private var showingConfirmation = false
Additionally, to watch this Boolean and show an alert as soon as it is true, we need to add an alert() modifier. Add this modifier right below the navigation title in CheckoutView;
.alert("Thank you!", isPresented: $showingConfirmation) {
    Button("OK") { }
} message: {
    Text(confirmationMessage)
}
And now we can complete our network code: we’ll decode the returned data, use it to set the confirmation message property, then set showingConfirmation to true to display the alert. If decoding fails—meaning the server sends something other than an order for any reason—we’ll print an error message.
Add this final code to the placeOrder() method, replacing the //handle the result comment.
let decodedOrder = try JSONDecoder().decode(Order.self, from: data)
confirmationMessage = "Your order for \(decodedOrder.quantity)x \(Order.types[decodedOrder.type].lowercased()) cupcakes is on its way!"
showingConfirmation = true
Now, if you try running it, you should be able to select exactly the cakes you want, enter your delivery information, and then press the Place Order button to see an alert. Everything is working nicely.
Still, we’re not quite done, because right now our network has a small but invisible problem. To see what it is, I want to introduce you to a bit of debugging with Xcode. We will pause our app so we can inspect a specific value.
First, click the line number next to the let url = URL... line. A blue arrow should appear there, which is Xcode’s way of saying we’ve placed a breakpoint. This tells Xcode to pause execution when it reaches that line, so we can poke around our data.

Now go ahead and run the app again, enter your order details, and then place the order. When everything goes well, your app should pause, Xcode should come to the front, and this line of code should be highlighted because it is about to be executed.
If everything goes right, you should see Xcode’s debug console on the lower right side of the Xcode window—this is where Apple’s internal log messages usually appear, but right now it should say “(lldb).” LLDB is the name of Xcode’s debugger, and we can run commands here to explore our data.
I want you to run this command there: p String(decoding: encoded, as: UTF8.self). This will convert our encoded data back into a string and print it out. You should see a lot of variable names underlined along with the observation registrar provided by the @Observable macro.

Our code doesn’t actually care about this because we’re sending all properties with underlined names, and the ReqRes.in server sends them back to us with the same names, which we then decode back into underlined properties. However, with a real server, these names do matter. So, we need to send the real names instead of the strange versions generated by the @Observable macro.
This means we need to create some custom coding keys for the Order class. It’s quite tedious, especially for classes where we want to save and load a few properties like this. However, it’s the best way to ensure our network is structured properly.
Open the Order class and add this nested enum here.
enum CodingKeys: String, CodingKey {
    case _type = "type"
    case _quantity = "quantity"
    case _specialRequestEnabled = "specialRequestEnabled"
    case _extraFrosting = "extraFrosting"
    case _addSprinkles = "addSprinkles"
    case _name = "name"
    case _city = "city"
    case _streetAddress = "streetAddress"
    case _zip = "zip"
}
If you run the code again, you can press the up arrow key and then the return key to repeat the p command. This time, you’ll see that the sent and received data is much cleaner.

With this last code, both our network and our application are completed.
You can also read this article in Turkish.
Bu yazıyı Türkçe olarak da okuyabilirsiniz.


