
With Project-10, we will examine networking with SwiftUI. Thus, we will be able to pull data from the internet and use it in our project. We will also be able to get images from the remote server and do form validation.
For Project-10 we will develop an application called Cupcake Corner. With this project we will explore how to send and receive data from the internet, how to validate forms, and we will also learn about Codable in depth.
Sending and Receiving Codable Data with URLSession and SwiftUI #
iOS gives us built-in tools to send and receive data from the internet. Combining this with Codable support, it is possible to convert Swift objects into JSON to send, then retrieve the JSON to be converted into Swift objects. Even better, when the request completes, we can immediately assign the data to SwiftUI view properties and have the UI updated.
To demonstrate this, we can load some sample music JSON data from Apple’s iTunes API and show it all in a SwiftUI List. Apple’s data contains a lot of information, but we’ll narrow it down to just two types: Result will hold the track ID, name and album it belongs to and Response will hold the result array.
So we can start with this code;
struct Response: Codable {
    var results: [Result]
}

struct Result: Codable {
    var trackId: Int
    var trackName: String
    var collectionName: String
}
Now we can write a ContentView that displays a result array.
struct ContentView: View {
    @State private var results = [Result]()

    var body: some View {
        List(results, id: \.trackId) { item in
            VStack(alignment: .leading) {
                Text(item.trackName)
                    .font(.headline)
                Text(item.collectionName)
            }
        }
    }
}
This will show nothing at first, because the results array is empty. This is where our network call comes in: we will ask the iTunes API to send us a list of all Taylor Swift’s songs, then we will use JSONDecoder to convert these results into a Result array instance.
But to do this we need to familiarize ourselves with two important Swift keywords: async and await . Any iPhone that can run SwiftUI can perform billions of operations every second - so fast that it completes most tasks before we even realize it has started. On the other hand, networking - downloading data from the Internet - can take a few hundred milliseconds or more, which is extremely slow for a computer that is used to doing billions of other things in that time.
Instead of forcing us to stop all progress while networking is in progress, Swift allows us to say “this will take some time, so please wait for it to complete while the rest of the application continues to run as usual “.
This functionality (the ability to leave some code running while our main application code continues to run) is called an asynchronous function. A synchronous function is one that runs completely before returning a value when needed, but an asynchronous function is one that can sleep for a while to wait for something else to complete before continuing. In our case, this means sleeping while our network code is happening so that the rest of our application doesn’t freeze for a few seconds.
To make this easier to understand, let’s write it in several stages. first add the following code to ContentView.
func loadData() async {

}
Notice the new async keyword here. We are telling Swift that this function may want to sleep to complete its job.
We want it to be executed as soon as List is shown, but we can’t just use the onAppear() method here because that method doesn’t know how to handle sleep functions, so it expects the function to be synchronous.
SwiftUI provides a different modifier for such tasks and gives it an easy-to-remember name: task() . This can call functions that can sleep for a while; all Swift asks us to do is to mark these functions with a second keyword, await, to explicitly acknowledge that there may be a sleep.
Let’s now add this modifier to List;
.task {
    await loadData()
}
Tip: Think of await as try. Just as we say we accept that try can throw an error, we say we understand that it can be a sleep.
There are three steps we need to complete in loadData();
- Create the URL we want to read
- Fetch data for this URL (Fetch)
- Decode the result of this data into a
Responsestruct (Decode)
We will add them step by step, starting with the URL. This needs to have a precise format “itunes.apple.com” and then we will add a set of parameters (you can find the full set of parameters if you do a web search for “iTunes Search API”) In our case we will use the search term “Taylor Swift” and the entity “song”, so add this now to the loadData() function.
guard let url = URL(string: "https://itunes.apple.com/search?term=taylor+swift&entity=song") else {
    print("Invalid URL")
    return
}
Step 2 is to fetch data from that URL, which is where sleep is most likely to happen. I say “likely” because it might not happen. iOS caches data a bit, so if the URL is fetched twice in a row, the data will be sent back immediately instead of triggering a sleep.
Regardless, a sleep is possible here, and we need to use the await keyword with the code we want to run every time a sleep is possible. More importantly, an error can also be thrown here, for example the user might not be connected to the internet at the moment.
Therefore, we need to use both try and await at the same time. Please add this code right after the previous code;
do {
    let (data, _) = try await URLSession.shared.data(from: url)

    // more code to come
} catch {
    print("Invalid data")
}
This revealed three important things, so let’s break it down;
- Our work is done by the
data(from:)method, which takes a URL and returns theDataobject from that URL. This method belongs to theURLSessionclass, which you can create and configure manually if you want, but you can also use a shared instance that comes with logical defaults. - The value returned from
data(from:)is a tuple containing the data from the URL and some metadata describing how the request went. We don’t use metadata, but we want the data of the URL, hence the underscore. We create a new local constant for `data and assign the metadata. - When using both
tryandawaitat the same time, we must writetry await(use ofawait tryis not allowed). There is no special reason for this, but they had to choose one, so they chose the one that reads more naturally.
So, if our download succeeds, our data constant is set to the data sent back from the URL, but if for some reason it fails, our code prints “Invalid data” and does nothing else.
The last part of this method is to convert the Data object into a Response object using JSONDecoder and then assign it to the results array property. This is exactly what we used before, so this should not come as a surprise, place the following code in place of the comment // more code to come.
if let decodedResponse = try? JSONDecoder().decode(Response.self, from: data) {
    results = decodedResponse.results
}
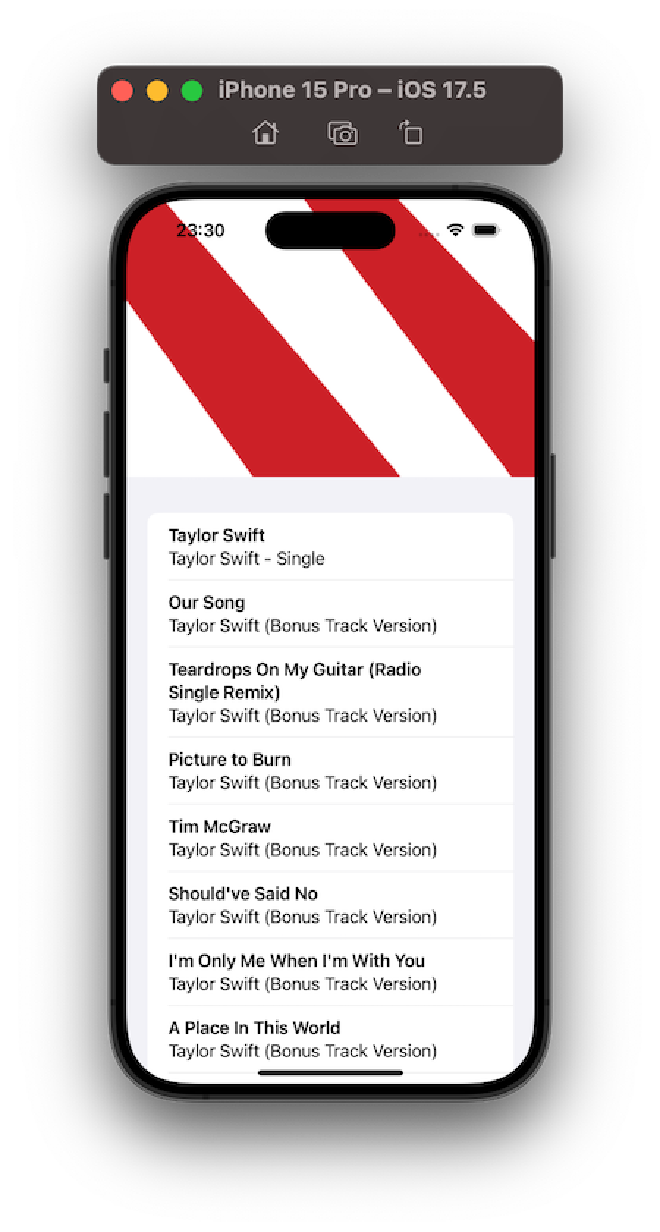
If you run the code, you will see that after a short pause a list of Taylor Swift songs appears.
All this just performs the data download. Later in this project, we’ll look at how to take a slightly different approach so that you can send Codable data, but that’s enough for now.

Image Load from Remote Server with SwiftUI #
SwiftUI’s Image view works great with images included in the app bundle, but if you want to download a remote image from the internet you need to use AsyncImage instead. These are created using an image URL instead of a simple asset name or a constant generated by Xcode, but SwiftUI takes care of everything else for us (it downloads the image, caches the download and serves it automatically).
So, the simplest image we can create looks like this.
AsyncImage(url: URL(string: "https://hws.dev/img/logo.png"))
This image is 1200 pixels high, but you will see that it is much larger when displayed. This gets straight to one of the main complexities of using AsyncImage: SwiftUI doesn’t know anything about the image until our code is executed and the image is downloaded, and therefore can’t properly size the image in advance.
If I were to add a 1200 pixel image to my project, I would actually call it [email protected] and then add an 800 pixel image as [email protected]. SwiftUI would then take care of loading the correct image for us and making sure it looks nice, clear and the right size. As it is, SwiftUI loads this image as if it was designed to be displayed at 1200 pixels high, which means it will be much larger than our screen and will look a bit blurry.
To fix this, we can tell SwiftUI that we are trying to load a 3x scaled image in advance, like this one;
AsyncImage(url: URL(string: "https://hws.dev/img/logo.png"), scale: 3)

But what if you want to give it a precise dimension? Then you can start by trying this
AsyncImage(url: URL(string: "https://hws.dev/img/logo.png"))
    .frame(width: 200, height: 200)
This won’t work, but maybe it won’t surprise you because it wouldn’t work with a normal Image either. So you can try to make it resizable like this;
AsyncImage(url: URL(string: "https://hws.dev/img/logo.png"))
    .resizable()
    .frame(width: 200, height: 200)
…. but that won’t work either and is actually worse because now our code won’t even compile. As you can see, the modifiers we’ve applied here cannot be applied directly to the image that SwiftUI downloads. This is because SwiftUI won’t know how to apply them until it actually receives the image data.
Instead, we will use a wrapper. This will ultimately contain our downloaded image, but it will also contain a placeholder to be used when loading the image. You can see the placeholder briefly when your app is running, it is a 200x200 gray square and will automatically disappear when the download is complete.
To set up our image, we need to use a more advanced AsyncImage form that passes us the final image view when it is ready, which we can then customize as needed. As a bonus, this also gives us a second closure to customize the placeholder as needed.
For example, we can make the finished image view both resizable and scalable to fit, and use Color.red for the placeholder to make it more prominent.
AsyncImage(url: URL(string: "https://hws.dev/img/logo.png")) { image in
    image
        .resizable()
        .scaledToFit()
} placeholder: {
    Color.red
}
.frame(width: 200, height: 200)
A resizable image and Color.red automatically takes up all available space, which means that the frame() modifier now actually works.
The placeholder view can be whatever you want. For example, if you replace Color.red with ProgressView(), you get a small spinner activity instead of a solid color.
If you want full control over your remote image, there is a third way to create an AsyncImage that tells us if the image has loaded, encountered an error or has not yet completed. This is especially useful when you want to show a custom view when the download fails (if the URL is not available or the user is offline, etc.).
Here is the code
AsyncImage(url: URL(string: "https://hws.dev/img/bad.png")) { phase in
    if let image = phase.image {
        image
            .resizable()
            .scaledToFit()
    } else if phase.error != nil {
        Text("There was an error loading the image.")
    } else {
        ProgressView()
    }
}
.frame(width: 200, height: 200)

Thus, it will show our image if it can, an error message if the download fails for some reason, or a spinning activity indicator spinning while the download is in progress.
Validating and Disabling Forms #
SwiftUI’s Form view allows us to store user input in a really quick and convenient way, but sometimes it’s important to go one step further, we need to check that input to make sure it’s valid before proceeding.
We have a modifier for this very purpose: disabled() This modifier takes a condition to check, and if the condition is true, the thing it depends on will not respond to user input (buttons won’t be touched, slider won’t be dragged, etc.) You can use simple properties here, but any condition will do: reading a computed property, calling a method, etc.
To illustrate this, here is a form that accepts username and email address;
struct ContentView: View {
    @State private var username = ""
    @State private var email = ""

    var body: some View {
        Form {
            Section {
                TextField("Username", text: $username)
                TextField("Email", text: $email)
            }

            Section {
                Button("Create account") {
                    print("Creating account…")
                }
            }
        }
    }
}
In this example, we don’t want users to create an account unless both fields are filled, so we can disable the form section containing the “Create Account” button by adding the disabled() modifier as follows;
Section {
    Button("Create account") {
        print("Creating account…")
    }
}
.disabled(username.isEmpty || email.isEmpty)
This means “this section is disabled if username or email is empty”, which is exactly what we want.
You can also use conditions like this as a separate computed property.
var disableForm: Bool {
    username.count < 5 || email.count < 5
}
You can now reference the modifier with this
.disabled(disableForm)
You can also read this article in Turkish.
Bu yazıyı Türkçe olarak da okuyabilirsiniz.